Monday 29 March 2021

Zyler The Cat & Friends

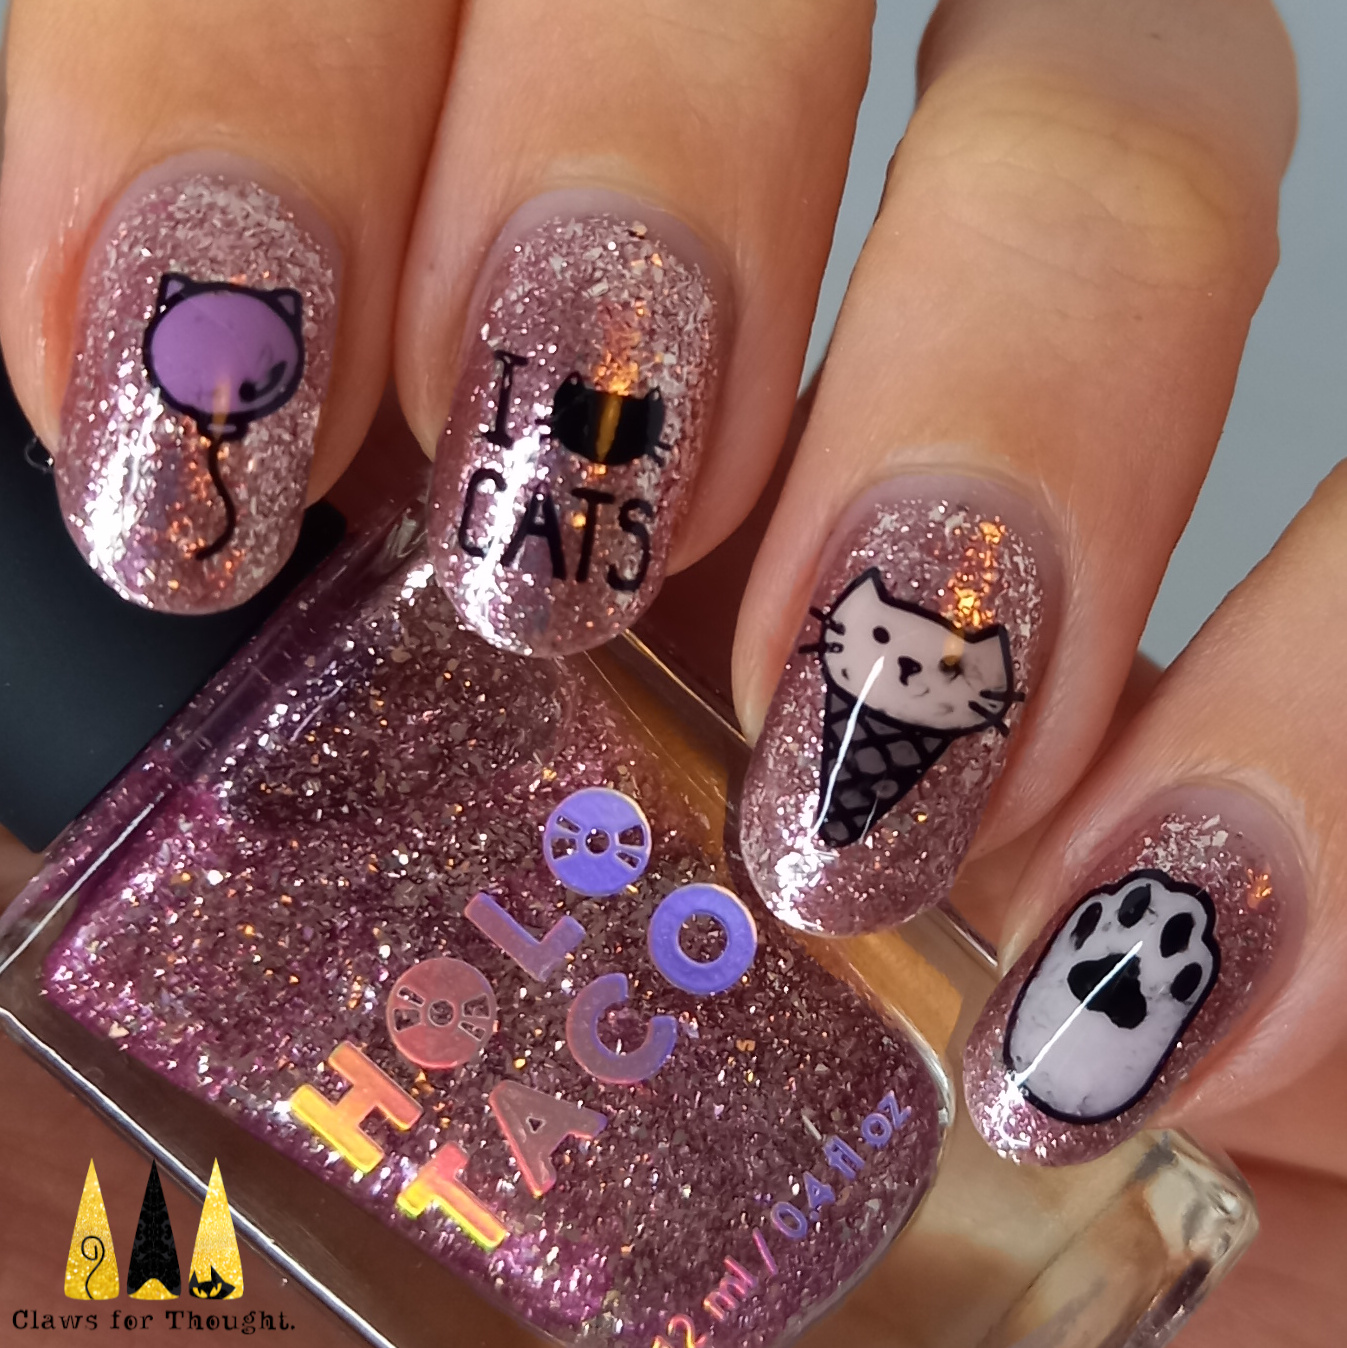
Miaow! Kitty cat nail art to share today using Holo Taco's Zyler The Cat nail polish as a base. I recently ordered this and it's partner, Menchie The Cat when ordering the new unicorn skin polishes. I have really been enjoying orange glitters lately and I love the cat theme and the glitter too so it's an all round winner! 

I started with a peel off base and then added a layer of orange glitter. Once dry I sponged on more glitter, and added one final layer on top. It dried pretty textured so I added a couple of layers of 'glitter grabber' clear polish before adding the nail art. For the images I used Mo You London's Animal 15 and Crazy Cat Lady 02 stamping plates. I created decals for the three cats, you can see how here.

In conclusion, the orange glitter was a little more textured than I expected but did eventually smooth out well after all the nail art and top coats! I really like this look but I'm still not 100% sure if orange glitter suits me - it just looks so much fun in pictures! Definitely a good one for autumn and Halloween nails when the time comes.

Colours used: Zyler The Cat - Holo Taco, Black Stamping Polish - Dance Legend, Cappuccino - Barry M, Cream Soda - Barry M, Little Bo Peep - Rimmel

Sunday 28 March 2021

Foiling Around

Hey all! Bit behind with the blogging again, not really sure why to be honest but I suppose I've had a bit more on recently - at least what feels like a bit more under the current pandemic circumstances. I took my nail polish off yesterday evening and still haven't re-painted yet which is very unlike me!

The previous weekend I decided to have a play around with some foils I have lying around as I bought some on eBay, and received a lovely set as a gift from a friend ages ago but still haven't got round to using them properly! I started with a base of pink to show through in case of any gaps, and used a peel off base too for easy removal. Once the polish was dry I added a layer of foil glue and waited for it to turn clear, indicating it had dried. My first attempt didn't really come out at all, I wonder if it wasn't fully dry yet (seen at the very bottom left of the pictures). However I was pleasantly surprised with the rest! The foil came out covering most of each nail, and the gaps where easy to patch up by re-applying the foil to my nails with a bit of pressure. I re-applied glue to my thumb nail and tried again and it worked reasonably well too.

So I know these aren't the neatest, but for a first try I'm pretty pleased with how well it worked - anything could have happened! I'm not a big fan or the base colour of this foil to be honest but I thought if I'm just experimenting I'll use my least faves! I've included a picture of the foil below to show how well each nail applied in (nearly) one piece!

The below pictures show a couple of things that didn't go well. On the left as mentioned above was my first attempt at the thumb. On the right is what happens if you apply a regular top coat... I applied a water based top coat to the foils so they would keep their shine. This worked however it didn't really last and the foils got damaged pretty quickly. However over the top on the thumb I thought I'd try a regular top coat thinking the water based one would act as a barrier to the foil, but it did not! Next time I think I'll just try more than one coat of the water based one.

Tuesday 23 March 2021

A Sunbeam Snake Attempt

Sssssssss hi! Sssnake nail art to share today so look away if you're not a reptile fan! No snakes were harmed in the making of these very shiny and slightly scruffy nails...

I have had this nail art look on my to do list for years! I originally saw them on So Hot Right Nail's Instagram and then watched the YouTube tutorial a few times. I loved the way the shiny foil shimmered through the snake pattern but didn't have all the appropriate tools for a long time, so I'm glad to have finally given it ago!

I started with a layer of clear gel polish,and while wet added little shards of silver foil I'd cut up using nail scissors, I went for approximately three pieces per nail. I then cured the gel and added a another clear layer which I cured. Next I added one layer of sheer black nail polish, the tutorial says to use gel but I don't have sheer black gel and using normal polish worked fine, I just needed to make sure it had plenty of time to dry. Once dry I stamped snake skin images from Uber Chic's Cold Blooded stamping plate over the top. Once fully dry I added a no wipe gel top coat. I used a peel off base under the whole look as I always do with gels.

My verdict on the overall result is mixed, but to be honest i think they came out pretty well given I was using techniques I'm not used to. I think the pattern on my ring fingernail was a little too wide but the others looked pretty snazzy! You can see already though that some of the foil shards did start to peel up a bit at the edges. Odd as they had layers over them but perhaps I just didn't fully seal in the edges well enough. I definitely enjoyed moving my hands around under bright lighting for the effect and would totally be up for trying these again.

Colours: Bluesky Gel Base Coat, Silver Foil (eBay), Coal - Fancy Gloss, Black Stamping Polish - Dance Legend, Gel Touch High Shine Gel Finish Top Coat

Saturday 20 March 2021

Three New Unicorns In Town

Hello world! Having been pretty good with my blogging for quite some time I seem to have got behind again, not sure how but never mind! I recently received a Holo Taco order which included their three new 'unicorn skin' toppers, and couldn't wait to try them out over a variety of colours. I've seen a few images or videos of them over black and white, and the blue and pink shades that were part of the collection. So I thought I'd give them a try over some other colours. Perhaps predictably they did look pretty similar over the colours I chose as they're all darker shades, but I still enjoyed seeing what they look like with different colours shining through.

I chose dark blue, purple and green as my base colours, and applied them alternately to my nails, with the one extra nail in black as I love how the unicorn skins look over black. I then applied each of the new Holo Taco shades over the blue/green/purple trio. On the black nail I used a sponge to attempt a gradient with all three unicorn skins. I say attempt as it really isn't a very well blended gradient! It did however give me a change to see just how intense the unicorn skins are when sponged on! I've included a picture of the thumbnail below.

From the second picture below the unicorn skins shown are Lunar, Sonic and then Galactic. Unfortunately I didn't realise how blurry the Lunar picture was until I'd edited and cropped them but I thought I'd keep it in anyway for consistency, you can see a clearer picture of the polish to the left. As expected I love these! The first unicorn skins wowed me and these three are just as spectacular!

Colours used: Watermelon - Barry M, Wigmore Street - Nails Inc, The Serpentine - Nails Inc, Lunar Unicorn Skin - Holo Taco, Sonic Unicorn Skin - Holo Taco, Galactiv Unicorn Skin - Holo Taco

Saturday 13 March 2021

Ultra Violet Pantone Dinosaur Nails

Hi all! I'm back so soon as I have more collaboration nail art to share and it's all been posted to Instagram at once! This is my entry for this months Nail Addicts Collab. The theme was 'turn back the clock', specifically focusing on the Pantone colour of the year colours over the years. We could choose which one we wanted to do, and just add black and white for nail art. I chose 2018's ultra violet, as we did a nail art theme on this back in 2018 and I fancied trying it again with a different look this time. I decided to try out one of my new dinosaur themed stamping plates from Mo You London (Jurassic Park 02) for this look. 

I started with a base of white on my middle finger and thumb nails, and violet on the other two. I then used white stamping polish to add the leaves to the purple nails, and the purple polish to add dinosaurs on my thumb and middle fingernails. The purple stamped pretty well which I was pleased with as it's not a stamping polish, but I did mess up a bit on my thumb nail. On my ring fingernail I used black stamping polish to add the geometric pattern. Shockingly I have never actually seen the Jurassic Park films (I just happen to like dinosaurs!) so I'm not sure if this pattern from the plate really relates to them or is just for fun!

Overall I like these, the colour scheme is good and I do love a dinosaur theme! Messed the thumb up a bit but it doesn't look too bad. I'm glad this collab theme made my try out the dinosaur images in purple as I might not have done otherwise.

Colours used: Wigmore Street - Nails Inc, Floral Street - Nails Inc, Black Stamping Polish - Dance Legend, White Stamping Polish - Rainbow Connection

Friday 12 March 2021

Party Kitty Nails!

Hello and Happy Birthday to anyone who has their birthday today! Happy un-birthday to those that don't! This nail art was created for the birthday of Katie's Dazzling Digits on Instagram. She is one of the organisers of the Nail Addicts Collab which I take part in each month. This is the first birthday collab I've been involved in and I love that it's got a cat theme! I have a few cat themed stamping plates and I haven't used these awesome balloon and ice cream images yet which are perfect for a party theme!

I started with a super shiny metallic base (colours listed below images) and then stamped the 'I love cats' image onto my middle finger from the Mo You London Animal Collection 15 stamping plate. I used images from the same plate for all other thumb and fingernails except my little finger. The image on my little finger is from the MYL Crazy Cat Lady 02 plate. All coloured in images were done using the advanced stamping technique on my Uber Mat, you can see how here.

In conclusion I really like these! The base colour starts it off really nicely and I like the combination and quirkiness of the cat themed images. Definite birthday party vibes!

Colours used: Fake Date - Holo Taco, Black Stamping Polish - Dance Legend, White Horse Street - Nails Inc, Basil Street - Nails Inc, Cappuccino - Barry M, Wardour Street - Nails Inc

Saturday 6 March 2021

Frosted Metal Crystals

Hi everyone! Back with more advanced stamping today and a whole lot of Holo Taco! It's well timed in a way as I may have just caved and ordered some of the new Holo Taco polishes! I've had Mo You London's Crystal 06 stamping plate for a while and have been deliberating the best polishes to use for it. I'm definitely going to try it with some glittery nail polish but thought these super shiny metallic shades would create an interesting look too.

I started with a pale pink base (colours listed below the pictures) for a somewhat sheer look. I then created decals on my Uber Mat (see how here) using black stamping polish and the colours from Holo Taco's Frosted Metals collection. The images I used on my middle fingernails were bigger than I'd anticipated! I think I should have placed them a little lower down so more of the pink base colour was showing. I love the witchy vibes of the image on my thumbnail.

Overall I quite like these but wonder if they'd have been better sparkly! It was good fun to use the Holo Taco Frosted Metals again though!

Colours used: Get Discovered - Nails Inc, Black Stamping Polish - Dance Legend, Mint Money - Holo Taco, Cold Shoulder - Holo Taco, Gift Receipt - Holo Taco, Fake Date - Holo Taco, Cheap Champagne - Holo Taco

Wednesday 3 March 2021

A Winter Woodland Manicure

Hi everyone! Back with more advanced stamping nail art today, no surprises there! I bought Mo You London's Fall In Love 10 stamping plate way back in the Autumn but didn't get round to using it until now. I think it works well for winter and Spring looks too, not just Autumn! The base for this (ILNP Stay Hidden) is currently my last untried nail polish - let's see how long that lasts!

While the base colour was drying I made decals for this look, you can see how here. I wasn't really sure how it would come out as I picked colours as I went along. I'm pretty happy with my choices and I particularly like the blue tress on my thumbnail. I added a glossy top coat to complete this look et voila! I like it, I think it's a cute look and works well with the base colour. Also how cute is that teeny hedgehog?!

Colours used: Stay Hidden - ILNP, White Stamping Polish - Rainbow Connection, Cyan - Barry M, Cappuccino - Barry M, Watermelon - Barry M, Cocoa - Barry M, Uptown Glamour - Nails Inc, Pomegranate - Barry M