You will need:
- A mat or kitchen roll to cover the surface you are working on
- A stamping plate
- Stamper
- Scraper
- Stamping polish
- Colours for filling in your design
- Dotting tool or small brush
- Clear nail polish
- Top coat
Step One:
Cover the image you would like to use with stamping polish. Alternatively you can add a thick line of polish at the top of the image and drag it across the image when you use the scraper (step two).
Step Two:
Holding your scraper at an angle (as shown), scrape of the excess nail polish so that it only fills the image and not the surrounding area.
Step Three:
Pick up the image with your stamper, pressing down firmly so that all of the image is picked up, but not hard.
If bits of other images, or bits of the image you don't want have picked up as well, you can use sticky tape to gently remove them from the stamper.
Step Four:
Leave the image a few minutes to dry, and then start colouring in with your dotting tool or brush, directly onto the stamper.
Use a dabbing/dotting motion rather than dragging as using normal brush strokes can drag away parts of the image.
The side you can see while you do this is the side that will be placed onto your nail, so don't worry if you cover some of the lines, just try not to go outside of them!
Step Five:
Fill in all of your design and allow 10-15 minutes to dry. I'd usually use this time to apply my base colour.
Step Six:
If you have used a dark base colour and want your image to stand out, colour the image in again using white polish and allow to try. If you've used a lighter base colour you can skip this.
Once all colouring in is dry apply some clear polish over and closely around the design. Do not use a quick dry top coat for this as it will dry to quickly and make the image go hard and crispy.
Step Seven:
There are two ways you can do this:
1) Roll the image directly onto your nail using the stamper. It's fine if your clear coat is still slightly sticky for this as it will help it stick to the nail.
2) For more precision of where you are placing the image, you can peel it off the stamper using tweezers (or long nails!), trim the edges (if necessary) and place it onto your nail, pressing the edges down with your fingers.
Step Eight:
Trim the edges further if required, and press the image down to make sure there are no lumps or bubbles. I find pushing from the middle outwards works best.
Once you have done that apply a top coat (fine to use a quick dry one this time!). I love this step as it really melts the image in to the nail and makes it look like it was painted directly onto your nail.
Ta da! I feel like this is a slightly messy example, but I suppose I am still learning too! I usually use my Uber Mat to make decals now, and will post a picture tutorial on that in the near future.
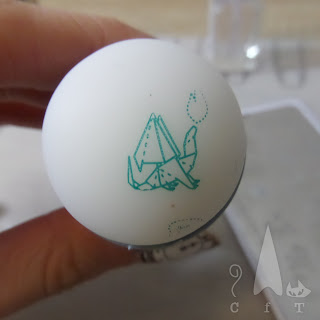
I find this technique is good for small images, like the origami dragon I used for this example. It can be used for images that cover the whole nail too, but I personally find a mat easier for those.
Thanks for reading!


No comments:
Post a Comment