Showing posts with label Tutorial. Show all posts

Saturday, 14 January 2017

Advanced/reverse stamping with stamping mat - In pictures

As promised (though a little later than intended - work is manic) here is my picture tutorial for advanced/reverse stamping using a stamping mat. My mat of choice is the Uber Mat from UberChic nails. I'm already looking back at the last tutorial and thinking the end result wasn't as good as usual, which isn't great for a tutorial! Perhaps I will add to the many video tutorials and link back to those in my blog instead. So, let's begin!

You will need:

  • A stamping mat
  • Stamping plate
  • Stamper and scraper
  • Stamping polish/highly pigmented polish
  • More polish for filling in your design
  • Clear nail polish
  • Dotting tool or small brush
  • Nail polish remover
  • Cotton pads
  • Top coat
  • Cotton buds of clean up brush


Step One:

Paint some clear polish onto the stamping mat where you would like to create your decals/images. 

This is necessary to give the image something to adhere to, If you don't to this step it is likely that the image just won't come off the stamper onto the mat.

Tip: Use a normal clear polish and not a quick dry top coat. Quick dry top coats will dry too fast and make the image lift when you're trying to work on it, or go crispy.


Step Two:

Cover the image you'd like to use in your stamping polish, and scrape off the excess as shown.

Promptly after this, press the stamper down onto the image and lift, so the image is picked up onto the stamper.


Step Three:

Roll the stamper over the clear polish on your stamping mat (once the clear polish is dry - this shouldn't take long).

Tip: It may be useful to put a piece of paper under your mat, or place the mat over a while surface so you can see the fine details of the image a little better.


Step Four:

Leave the image a few minutes to dry, and then start colouring in with your dotting tool or brush, directly onto the mat.

Use a a dabbing/dotting motion rather than dragging as using normal brush strokes can drag away part of the image

The side you cane see while you do this is the side that will be placed onto your nail, so don't worry if you cover some of the lines, just try not to go outside of them!


Step Five:

Fill in your image and allow 5-10 minutes to dry. You can test it by touching it very lightly.

Once dry apply another clear layer over the top, and allow another 10-15 minutes to dry. I find this is a good time to apply your base colour.


Step Six:

Once the clear coat is dry bend the mat a little, close to one of the images, so that the edge starts to lift.

Use some tweezers (or a long fingernail!) to take hold of the edge, and gently pull the image away from the mat.


Step Seven:

Hold the decal gently with one hand/your tweezers, and use nail scissors to trim the excess from around the image.

The less excess the better, as this will make clean up and application easier!


Step Eight:

Place the image gently on your nail, with the side that was facing up on your mat, facing down on your nail. It will look kind of matte at first, but not once it has a top coat!

Life the edges to trim off any further excess with nail scissors.


Step Nine:

Press the image down, starting in the middle and pushing outwards towards the edges.

Use a cotton bud, or clean up brush dipped in nail polish remover/acetone to clean around the edges and seal the edges of the decal down if necessary.


Step 10:

Apply a top coat over the entire nail and allow to dry (fine to use a quick dry one this time!).

I love this step as it really melts the image into the nail and makes it look like it was painted on directly.


Voila! I tend to use my Uber Mat as by preferred tool for advanced/reverse stamping as you can do so many images at once. I often create a few more decals than I need so I can pick the best ones to go on my actual nails. Thanks for reading!


Monday, 2 January 2017

How to do advanced/reverse stamping - In pictures

Hi there! Today I'm showing you how to do advanced/ reverse stamping in pictures. I use this technique a lot (both the original way and using an Uber Mat - tutorial on that to follow), so thought it would be good to have a guide to refer back to so my blog posts make more sense! All the stamping tools I've used are from Mo You London.

You will need:
  • A mat or kitchen roll to cover the surface you are working on
  • A stamping plate
  • Stamper
  • Scraper
  • Stamping polish
  • Colours for filling in your design
  • Dotting tool or small brush
  • Clear nail polish
  • Top coat


Step One:

Cover the image you would like to use with stamping polish. Alternatively you can add a thick line of polish at the top of the image and drag it across the image when you use the scraper (step two).


Step Two:

Holding your scraper at an angle (as shown), scrape of the excess nail polish so that it only fills the image and not the surrounding area.


Step Three:

Pick up the image with your stamper, pressing down firmly so that all of the image is picked up, but not hard.
If bits of other images, or bits of the image you don't want have picked up as well, you can use sticky tape to gently remove them from the stamper.


Step Four:

Leave the image a few minutes to dry, and then start colouring in with your dotting tool or brush, directly onto the stamper.
Use a dabbing/dotting motion rather than dragging as using normal brush strokes can drag away parts of the image.

The side you can see while you do this is the side that will be placed onto your nail, so don't worry if you cover some of the lines, just try not to go outside of them!


Step Five:

Fill in all of your design and allow 10-15 minutes to dry. I'd usually use this time to apply my base colour.


Step Six:

If you have used a dark base colour and want your image to stand out, colour the image in again using white polish and allow to try. If you've used a lighter base colour you can skip this.

Once all colouring in is dry apply some clear polish over and closely around the design. Do not use a quick dry top coat for this as it will dry to quickly and make the image go hard and crispy.


Step Seven:

There are two ways you can do this:

1) Roll the image directly onto your nail using the stamper. It's fine if your clear coat is still slightly sticky for this as it will help it stick to the nail.

2) For more precision of where you are placing the image, you can peel it off the stamper using tweezers (or long nails!), trim the edges (if necessary) and place it onto your nail, pressing the edges down with your fingers.


Step Eight:

Trim the edges further if required, and press the image down to make sure there are no lumps or bubbles. I find pushing from the middle outwards works best.

Once you have done that apply a top coat (fine to use a quick dry one this time!). I love this step as it really melts the image in to the nail and makes it look like it was painted directly onto your nail.


Ta da! I feel like this is a slightly messy example, but I suppose I am still learning too! I usually use my Uber Mat to make decals now, and will post a picture tutorial on that in the near future.

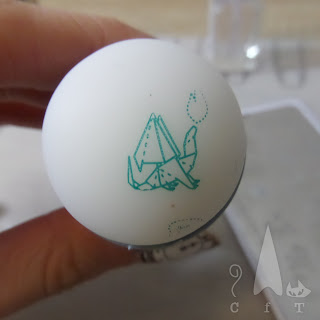
I find this technique is good for small images, like the origami dragon I used for this example. It can be used for images that cover the whole nail too, but I personally find a mat easier for those.

Thanks for reading!

Sunday, 4 December 2016

Magical Mirror Nails - Mirror Chrome Powder First Attempt

Finally it's mirror chrome time!! So it's the 4th of December and I've not put up any Christmas nails yet... I have some Christmas nail art on now, so it's on it's way! I just couldn't wait till after the festive season to share how I got on with the mirror chrome powder that's been getting everyone excited this year. As ussual witbh a new nail trend that I want to experiment with, I decided to start cheap and get some mirror chrome powders on eBay. I went for a classic silver, a blue/purple (below) and a blue/green.

I had a lot of fun trying this our on my Uber Mat, I had to try a few different ways to get anywhere and had more luck with the silver than the multi-chrome shades. I tried a few techniques and once I found one I was happy with I gave it a go on my nails. I've included some top tips below the pictures. I was astounded how well it worked on my nails, definitely easier than using it on the Uber Mat! Needless to say it was so satisfying to see it come together on my nails.

I've heard a few things about how this doesn't work on normal nail polish, or works better on gel polish. Mine was done using standard nail polish and I have to say I am very pleased with the results! I think I could have got it slightly more mirror'd with practise (and there will be practise!) but already it is noticeably shinier than any chrome/metallic polish I've tried. It's hard to make out in the pictures but at some angles I could see a wobbly version of my reflection in them!

Tips for mirror chrome powder on regular nail polish:


  • Make sure the polish you apply the powder over is smooth and free of imperfections. Any little lumps and bumps are visible through the mirror effect.
  • Apply a top coat over your base colour, and apply the powder when it's still very slightly tacky. A good way to check if it's just right is to touch it lightly with a finger to see if it feels dry, when it does try lightly touching your nails together, if there is a slight tackiness then the powder should stick well to the polish.
  • Don't apply too much pressure when applying the powder. It's surprising how little pressure is needed to achieve the mirror effect. The tip above helps ensure it sticks. As the polish is still very slightly sticky if you press to hard it can move some of it around and create lumps which will certainly upset the mirror effect!
  • Use a water based top coat. This is to stop creases forming in the powder. I used Revolution from Picture Polish which worked well as a top coat. Pretty hard to remove when used as a base coat though!
Thank you for reading! It's been a bit excessive writing wise, I've just got more to say than usual as I'm  so excited about this stuff! A truly gorgeous finish, and much easier to do than I expected.

Thursday, 24 November 2016

Glitter and Cats - How To Use Water Decals

Miaow everyone! Two of the greatest things on tonight's nails - glitter and cats. I recently reviewed two stunning nail polishes from Painted Polish (see the review here). It was a little painful to contemplate putting anything over the glitter explosion that is Painted Polishes 'Crunk On Copper', but I was keen to try out these cat decals and thought they would go well!

I haven't used water decals before so I watched a few video's on YouTube to get an idea of how to do it. There weren't any instructions with the actual decals so I just chose my favourite from what I saw on YouTube. I've included instructions below the pictures. Despite my reservations about covering glitter, I loved how these turned out! Just wish the pictures showed the holo up a bit better!
How to use water decals:

1) Cut around the shapes you will be applying to your nails.
2) Peel off the clear plastic layer.
3) Place each piece in warm water for about 20-30 seconds
4) Gently remove the decal with your finger (it should slide away easily) and place it on your nail.
5) Allow the decal to dry a little (so it stops sliding around!) and lightly add a top coat to keep it in place.


Friday, 25 March 2016

Mini Egg Nails - A Classic Easter Manicure

Today I'm showing a design  I did for last Easter, and am very much tempted to try again as I just loved the final effect, and it was so easy to do. This by no means an original design, I have seen it sooo many times online, whoever thought of it first is a nail art genius! Before trying it myself I looked at a number of different tutorials, and then  took the steps I liked best.

Mini Egg Nails - How To
  1. Paint your nails in plain pastel colours, the sort you'd find in a pack of delicious chocolate eggs
  2. On a piece of plastic or tin foil, paint a splodge of dark brown polish (or back if you don't have brown)
  3. Use an old toothbrush (or a nail art fan brush if you think that's too icky!) to pick up some of the brown polish, and lightly dab it on to your nails.
  4. Start lightly and then build up for your desired speckled effect.
  5. Put some white or cream polish onto your plastic/foil
  6. Using cling film/ saran wrap, gently pick up some of the polish and very lightly dab it onto your nails, this gives the effect of a light dusting of sugar.
  7. Finish with a matte top coat. Ta da!
Colours used: Wardour Street - Nails Inc, Coconut - Barry M, Notting Hill Carnival - Nails Inc, Mint Green - Barry M, Peach Melba - Barry M, Cocoa - Barry M