Showing posts with label Glitter. Show all posts

Saturday, 27 May 2023

Return of the Cactus!

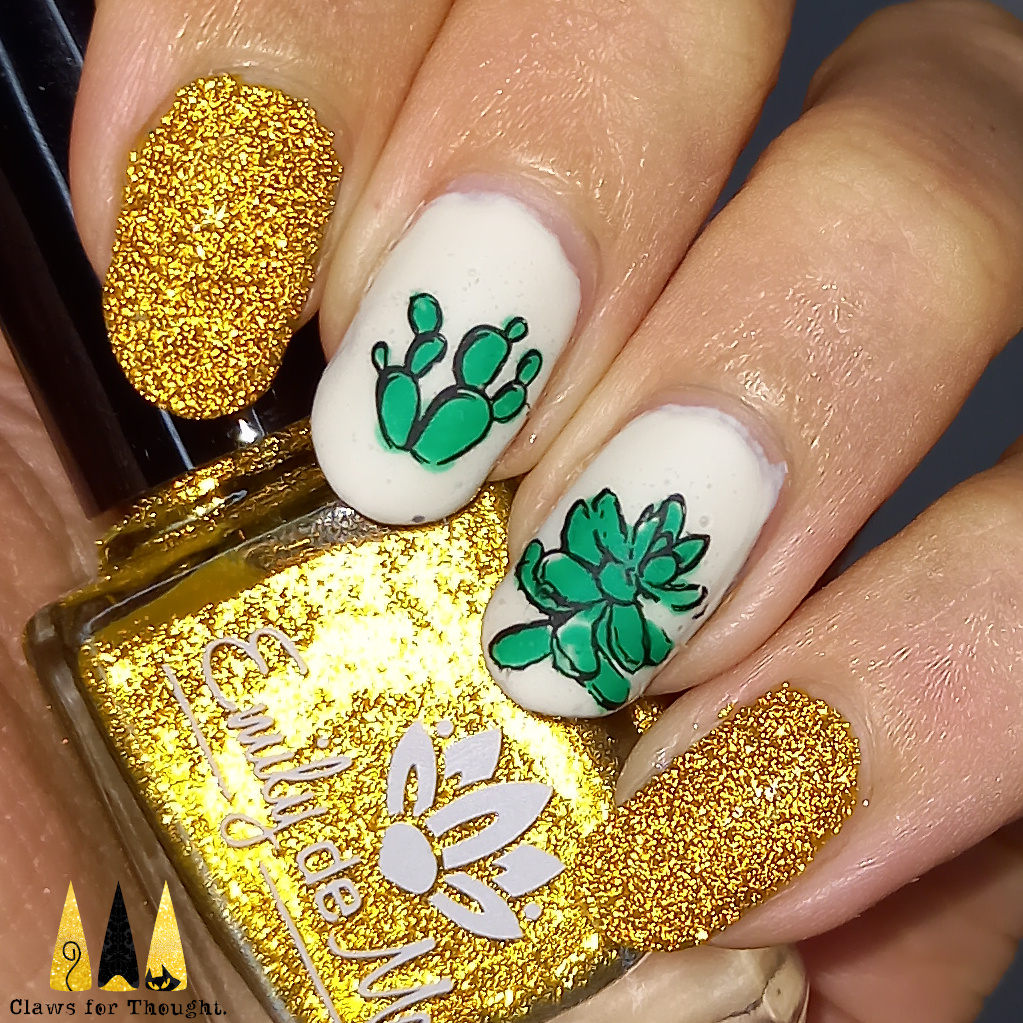
Hey space turtles! Back with more cactus nail art today as I had more than one cactus nail art idea and thought this would be a good opportunity to try out this yellow reflective glitter I got for Christmas (last untried from my Christmas polishes!). 

For the cactus images I used Uber Chic's Succulent stamping plate to create some decals on my Uber Mat.They were nice and straightforward to do using only two colours. While these dried I applied two layers of off-white to my middle two nails and two layers of glitter to the others. After trimming the decals and applying them to my nails I finished the look with a glossy top coat. Ta-da!

Colours used: Radiant Forces - Emily de Molly, Cream Soda - Barry M, Black Stamping Polish - Dance Legend, Spring Green - Barry M

Tuesday, 2 May 2023

Brand New Butterflies

Hey space turtles! Another Glam Nails Challenge look to share today - as you may have guessed the theme for this one is butterflies. I have a layered images butterfly stamping plate (Paradise 07) from Mo You London I've been meaning to try for a while so was pleased to finally use it for this look.

I started with a pale lilac base and then some silver glitter, followed by more silver glitter (colours listed below). I then added a glossy top coat which also has a hint of purple to it so between that and the base colour it gave the silver a bit of a lilac look. Next I added the butterfly images from the stamping plate, layering them up from dark to light before adding another layer of top coat. The pink one didn't really go to plan and I tried a few different colours but otherwise I really like this look. My favourites are the green butterfly and the one on my thumb nail.

Colours used: Lavender Ice - Painted Polish, Cosmic Girl - Danglefoot Polish, Diamond Glitter - Barry M, Wardour Street - Nails Inc, Plum - Barry M, Laguna - Barry M, Cyan - Barry M, Acai Smoothie - Barry M, Pink Lemonade - Barry M, Key Lime - Barry M, Watermelon - Barry M, Black Stamping Polish - Dance Legend, Essential White - Uber Chic

Tuesday, 25 April 2023

A Reflective Rainbow

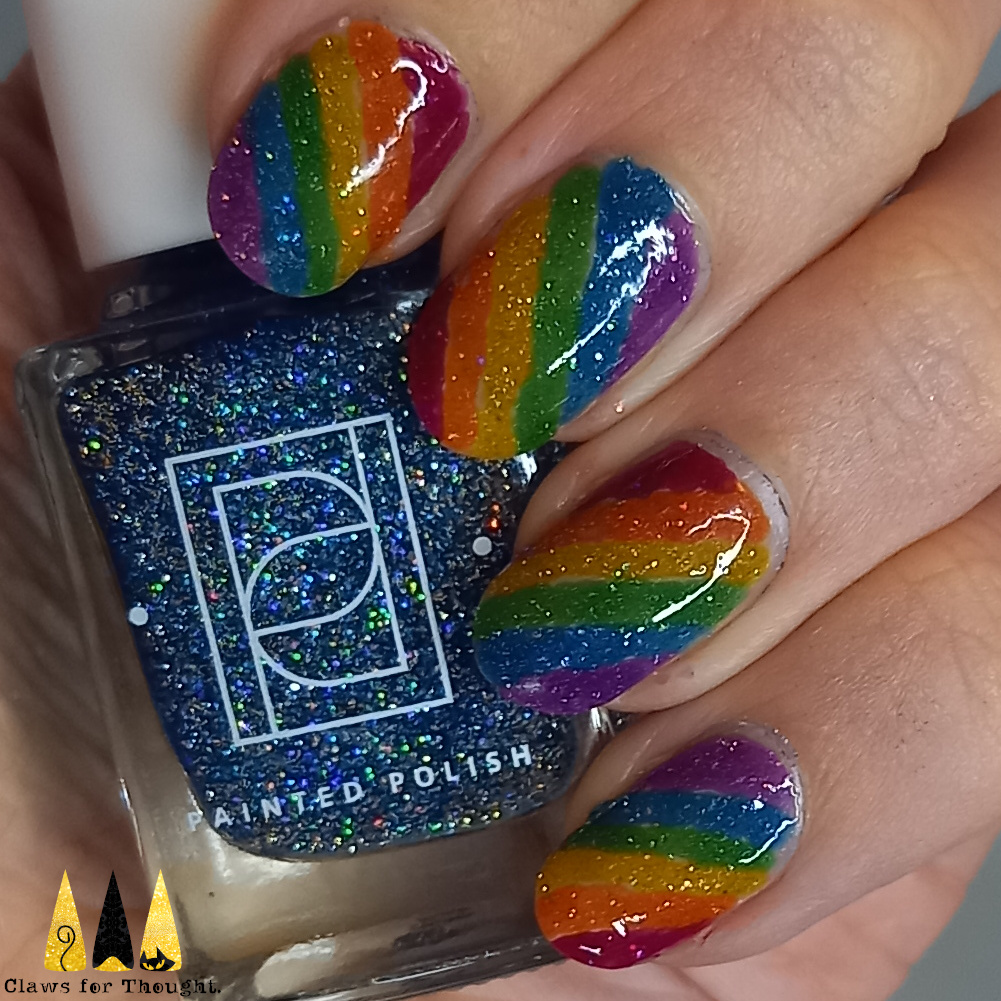
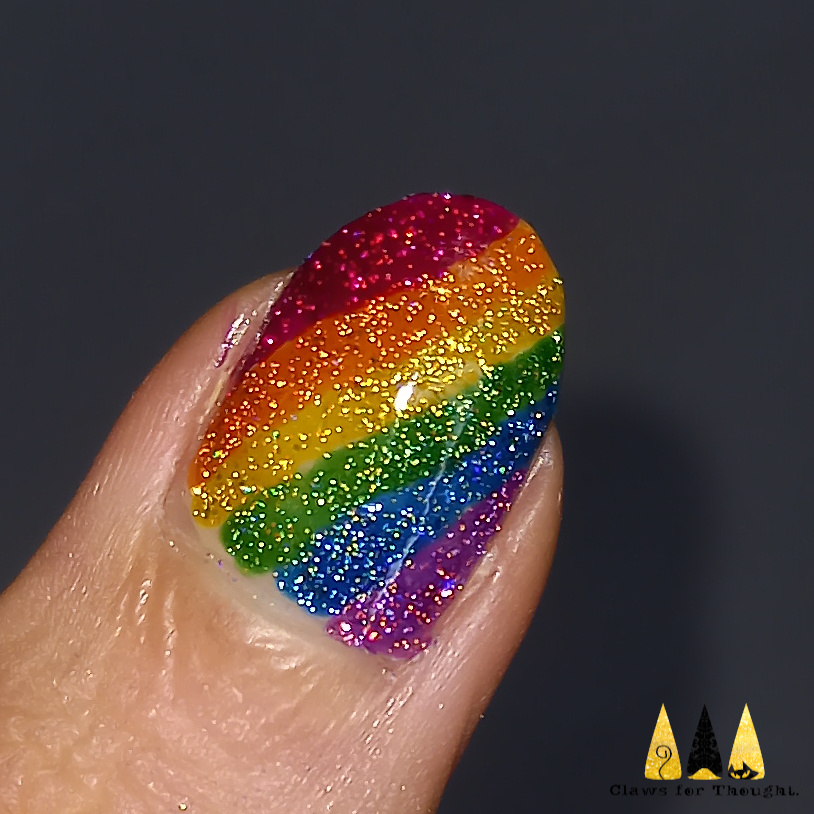
Hey space turtles! Something fun and bright to share today - rainbow nails. This was for a Glam Nails Challenge prompt on Instagram but is also something I'd been meaning to do for a while with my new rainbow reflective glitters (colours listed below pictures). 

I started with a nude base coat for opacity as I knew there's only be one layer of sparkly polish. I then used a small nail art brush to add the striped on my nails one colour at a time. This was easier and came out neater than I expected as the consistency of these polishes is so perfect for it. Reflective glitters tend to be quite opaque and thick so it worked really well. I loved looking at these gorgeous glitters sparkling in the sun too! All of the colours are from the Painted Polish 'At Sea: Rainbow Reef' collection except the red as that wasn't in stock where I buy my indie polishes. The red is from the same brand and finish however so is close enough I think, just slightly darker. Love how these came out :)

Colours used: Soft Focus (nude) - Polished for Days, You Razz My Berries, Shell We Dance, Catch Sun Rays, Can't Kelp Myself, Laguna Matata, Feelin' Knotty - All Painted Polish

Tuesday, 18 April 2023

Rainbow Sparkle Ladybird's

Hey space turtles! This is my final catch up blog post for now, and it's for last Wednesday's Glam Nails Challenge theme of Ladybug. I've done ladybird nails before and thought of a few ways I might do them a little differently, settling on some sparkly purple ladybirds which don't cover my whole nail. I wasn't sure whether to add eyes as they looked quite good without but glad I did as I definitely like them best that way. Pictures of both in reflective and non-reflective forms are below.

I started with a muted pink base coat which ended up looking a bit more purple after I added a tinted top coat at the end! I then painted a line on each nail where the purple point would end and then added a thick layer of sparkle underneath it. I used a small nail art brush to outline their little heads and fill them in before painting some antennae. Once dry I added lined down the middle and then used a dotting tool to add the spots and eyes, finishing with a super glossy top coat. Love how these turned out :)

Colours used: Briar Rose - Polished for Days, Rainbow Stardust - Fancy Gloss, Essential White - Uber Chic Beauty, Lady In Black - OPI

Thursday, 30 March 2023

Strawberry Reflections

Hey space turtles! I'm launching straight into Spring with some nails which are actually quite summery! I have loved this winter so I'm sad to see it go but Spring brings new opportunities too (and lots of gardening unfortunately!). I was inspired by Kim Sorta Nailed It on Instagram to use this reflective red nail polish for strawberry nail art (colours listed below the pictures).

I started with a peel off base and then two coats of red reflective glitter. I almost only needed one coat as it's so rich and opaque - such a beautiful nail polish! Next I used a nail art brush to add leaves in green nail polish. Once done I added the little seeds in yellow. I would have probably done the seeds in black so I'm glad I had the inspiration pictures to try it in yellow for a brighter look. I really like the way these work with my shorter nails and I think it's a fun look. They're not perfectly neat but you can certainly tell what they are and I love the sparkle!

Colours used: Burning Bright - Emily de Molly, Spring Green - Barry M, Notting Hill - Nails Inc

Monday, 13 February 2023

Happy Valentines Day Beavers!

Hello space turtles and eager beavers! I was struggling for inspiration for Valentines Day nail art this year so I put out a request for ideas on Instagram and a friend suggested animals who mate for life. With that and another thought that later popped into my head I now have too many ideas! I think this one is my favourite though so I'm sharing it on actual Valentines Day. The first animal I've chosen which mates for life is beavers. This one is also close to my heart as I'm part of a winter swimming group called 'frosty beavers and shy turtles' so this is fitting for that too!

I started with a peel off base coat and two layers of red reflective glitter on three of my nails, and pale muted pink on the other two. I had no beaver images on my stamping plates so this was one of my rare moments of freehand! I added the brown polish with the brush from the bottle, and then used a small nail art brush and dotting tool for the details on the beavers face. I used a striping brush for the pattern on the tail. I also used a small nail art brush to add two red hearts in the same red glitter. I finished the look with a glossy top coat.

I love how these turned out! The beavers tail is a tiny bit smudged but it's only visible in pictures or very up close. I love this gorgeous red glitter too - another of my Christmas presents. Colours used are listed below the pictures and the pictures show the look in different lighting and angles.

Colours used: Burning Bright - Emily de Molly, Vintage Tee - Nails Inc, Cappuccino - Barry M, Cocoa - Barry M, Cream Soda - Barry M

Wednesday, 1 February 2023

Winter Animal Village

Hey space turtles! Today's nail art is using another new nail polish I got for Christmas (Fancy Gloss - Ice Queen) and a stamping plate I've used a fair few times but just love so much! These little winter cabins on Mo You London's Noel 01 stamping plate are so cute and when I used them a week or two ago I thought it would be good to try them again with a paler background and some sparkly snow. 

For this look I made decals on my Uber Mat. For the animals on the sparkly nails I used Mo You London's Noel 09 stamping plate. I added some stars and moons to the lilac nails before I trimming down the decals and adding them to my nails. They are a tad smudged but not too bad. I think I should have removed the smoke from my middle fingernail too as it doesn't look quite right. The snow is shimmer polish with white underneath. Finished the look with a glossy top coat and enjoyed :) Pictures below with and without flash,

Colours used: Wardour Street - Nails Inc, Ice Queen - Fancy Gloss, Black Stamping Polish - Dance Legend, Essential White - Uber Chic, Cappuccino - Barry M, Little Bo Peep - Rimmel, Indigo - Barry M, Bright Purple - Barry M, Aura - Nails Inc

Tuesday, 31 January 2023

Snowdrops

Hey space turtles! Today's nail art is for another Glam Nails Challenge theme, this time it's 'snowdrops'. I wasn't quite sure how to do them so thought I'd try a basic snowdrop look on one nail, and add seals to another two as those big fluffy seal pups are snowdrops of a sort! I also wanted to try out a fairy lights in the woods look and thought that would fit here too.

I started with a base of lilac and pale pink glitter (colours listed below the pictures). I made decals on my Uber Mat using a fairy lights image from Uber Chic's Holiday Spirit stamping plate and trees image from Mo You London's Noel 08 plate. While these were drying I painted on the little white seals and some snowflakes from the Uber Chic plate. I don't think I got the placement of the features quite right but they still look like cute little seals! I also painted on some basic snowdrops on my ring fingernail. I then added the trees decal followed by the lights before a glossy top coat.

Although these have their imperfections I do rather like them. Can't go wrong with baby seals! I am wearing seal pyjama's as I write this :D

Colours used: Nimbus - Illyrian, Charming - Illyrian, Essential White - Uber Chic, Black Stamping Polish - Dance Legend, Little Bo Peep - Rimmel, Gold Digger - Barry M, Key Lime - Barry M

Monday, 9 January 2023

Let It Snowww

 ... but let it wait till I've stopped commuting to London! Today's snow nail art is for one of this months Glam Nails Challenge prompts. I decided to try out a new sparkly reflective polish I got for Christmas and thought it would be just right to go with snowflakes. I started with a peel of base and then two layers of glitter. I had many snowflake stamping plate images to choose from and settled on the Noel 20 plate from Mo You London for the multi snowflake image and for the individual ones I used their Festive 02 plate. I added the images using white stamping polish after a 'glitter grabber' layer of clear polish. I then used a dotting tool to add some more snow and finished the look with a quick dry top coat.

Below you can see the look with and without flash. I love the colour and the sparkly effect. These were simple to do and I really like them. In particular the index finger and little fingernail. Really loving doing some more wintery designs!

Colours used: See Through You - Emily de Molly, Essential White UberChic Beauty

Friday, 6 January 2023

Happy New Year 2023

Happy new year! I have some nail art to share and when I went to do it I realised that I hadn't shared either of my new years eve looks so have decided to share them together in one blog post since I've already got a couple more to catch up on!

Look one - New Years Day. I started with a peel off  base coat followed by a layer of nude polish. I then added two layers of tinsel themed sparkly nail polish and a 'glitter grabber' to smooth it out a bit. I made decals on my Uber Mat for the thumb nail and middle fingernail using Mo You London's Noel 10 stamping plate. I hadn't remembered that it would be a reverse image so it's not really clear that the bottles are meant to say gin! The other images were stamped directly onto my nails and 2023 was freehand. I was pretty pleased with my freehand numbers though I wish the 3 wasn't disappearing into the corner!

Look two - New Years Eve. This look was to capture the still very festive feelings around new year and parties/celebrations. I also had a new red polish I wanted to try so gave that a go. Images are from Mo You London's Noel 15 and Festive 05 stamping plates and stamped in gold (pictured). This was simple and easy to do but I'm pleased with it. Captures the right vibes I think!

Colours used: Tinsel Garland - Fancy Gloss, Black Stamping Polish - Dance Legend, Watermelon - Barry M, Red Hot Rio - OPI, Gold Digger - Barry M
Red - Undisclosed, Bright Lights - Barry M

Tuesday, 27 December 2022

Gifts and Gold

Merry Christmas space turtles! Today I'm sharing some nail art I had on for Christmas Day which fits one of the December Glam Nails Challenge prompts which was Gifts. I wanted to do something quite snazzy and sparkly for Christmas so went for a reflective glitter and a stamping plate I was excited to use more of.

I started with a peel off base coat and then a few layers of reflective gold glitter followed by a layer of gold holographic glitter. While all of this was drying I was creating decals on my Uber Mat using Mo You London's Noel 15 stamping plate. I chose all gift themed images and was pleased to try these vintage looking images, particularly the dog and the lady with the big skirt. After I'd applied the decals I added a glossy topcoat and job done! Definitely wasn't as quick as I've just made it sound though :D

I really like these though the only downside is that the images are quite dark so if lighting isn't great the colours and intricate details of the design don't always show up. Pictures below with and without flash so you can see them in natural light and with reflective glitter activated.

Colours used: Flash Platinum Gold - Fun Lacquer, Million Dollar Dream - Fyn Lacquer, Black Stamping Polish - Dance Legend, Cream Soda - Barry M, Red Hot Rio - OPI, My Car Has Navy-gation - OPI, Watermelon - Barry M, Cappuccino - Barry M, Charlotte Street - Nails Inc