Showing posts with label Snowflake. Show all posts

Tuesday, 31 January 2023

Snowdrops

Hey space turtles! Today's nail art is for another Glam Nails Challenge theme, this time it's 'snowdrops'. I wasn't quite sure how to do them so thought I'd try a basic snowdrop look on one nail, and add seals to another two as those big fluffy seal pups are snowdrops of a sort! I also wanted to try out a fairy lights in the woods look and thought that would fit here too.

I started with a base of lilac and pale pink glitter (colours listed below the pictures). I made decals on my Uber Mat using a fairy lights image from Uber Chic's Holiday Spirit stamping plate and trees image from Mo You London's Noel 08 plate. While these were drying I painted on the little white seals and some snowflakes from the Uber Chic plate. I don't think I got the placement of the features quite right but they still look like cute little seals! I also painted on some basic snowdrops on my ring fingernail. I then added the trees decal followed by the lights before a glossy top coat.

Although these have their imperfections I do rather like them. Can't go wrong with baby seals! I am wearing seal pyjama's as I write this :D

Colours used: Nimbus - Illyrian, Charming - Illyrian, Essential White - Uber Chic, Black Stamping Polish - Dance Legend, Little Bo Peep - Rimmel, Gold Digger - Barry M, Key Lime - Barry M

Monday, 9 January 2023

Let It Snowww

 ... but let it wait till I've stopped commuting to London! Today's snow nail art is for one of this months Glam Nails Challenge prompts. I decided to try out a new sparkly reflective polish I got for Christmas and thought it would be just right to go with snowflakes. I started with a peel of base and then two layers of glitter. I had many snowflake stamping plate images to choose from and settled on the Noel 20 plate from Mo You London for the multi snowflake image and for the individual ones I used their Festive 02 plate. I added the images using white stamping polish after a 'glitter grabber' layer of clear polish. I then used a dotting tool to add some more snow and finished the look with a quick dry top coat.

Below you can see the look with and without flash. I love the colour and the sparkly effect. These were simple to do and I really like them. In particular the index finger and little fingernail. Really loving doing some more wintery designs!

Colours used: See Through You - Emily de Molly, Essential White UberChic Beauty

Monday, 5 December 2022

A Snowflake Nail Fail!

Hey space turtles! I'm feeling a bit ill today and I have a nail fail to share - so not my brightest day! After my success with the chrome powder stamping I decided I wanted to try the same with glitter. I started with two coats of black polish and then a matte top coat. Once fully dry I used sticking stamping polish to add some snowflakes from Mo You London's Noel 08 stamping plate, and then dipped each nail in glitter before brushing off the excess and rubbing in those particles that stuck to the polish.

As you can see there are some sort of snowflake-ish shapes but some stuck a lot better than others (it stuck a little too well on my little fingernail!). Unfortunately I couldn't get any more to stick. I wonder if I should have done them one at a time rather than stamping all of them and then adding the glitter, but I expected it to stick to the sticky polish. I also wonder if the glitter particles were too big and I need thinner glitter. Will just have to try again sometime I guess!

Colours used: Lady In Black - OPI, Matte Taco - Holo Taco, Black Sticky Stamping - Dance Legend, Silver Glitter (Holocopter) - Twinkled T

Saturday, 15 January 2022

Fool's penguin!

Hello nail people! Some more winter nail art to share with you today. This is a delayed one for Wednesday's Glam Nails Challenge prompt which was penguins. The base colour is one that's been on my radar for a long time and received for Christmas, so am enjoying trying it out. Penguins are such a classic and cute winter nail art theme which I have a few stamping plate options for, so I did go back and forth s bit on what to do.

I started with a blue shimmery base and then added white snowflakes from Mo You London's Festive 02 stamping plate. Next I used their Noel 11 plate for the penguins. No decals required here, just a variety of shapes to layer up to create the penguins. I didn't add all of them as I thought adding the little hats and things would make it a bit too Christmassy. They look like cute tubby little penguins I think! I did realise once I got the second plate out that it also has snowflakes so I could have used those, but never mind.

I'm pleased with these, I like the fun base colour and what's not to like about penguin nails?! Only thing I'd change is maybe adding more to the scarf so you can tell that's what it is. Oh and the strange title of this post is from the nail polish name - as you may have guessed from the pictures!

Colours used: Fool's Gold - Picture Polish, Grey - Barry M, Watermelon - Barry M, Plum - Barry M, Black Stamping Polish - Dance Legend, White Stamping Polish - Rainbow Connection, Beach Hut - Models Own

Sunday, 9 January 2022

Snowy Snowy Snow Globe

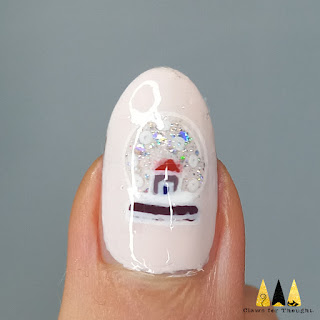
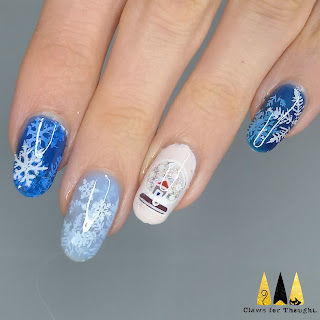
Hey everyone! Back with some wintery nail art which feels appropriate in this frosty weather! I've had a really lovely weekend, with a lovely walk and nut roast yesterday and getting a good run in this morning before lunch with friends. It has however been pretty cold and frosty, but it's to be expected in January I suppose! So today's nail art is for the first two prompts for this months Glam Nails Challenge which has lots of lovely winter themes. It was a busy first week back at work so I didn't get round the the first theme which was snow globes, but it goes pretty well with today's theme (snowflakes) so all is well!

I started with a base of sheer blue polish (in various shades) on three of my nails and a couple of layers of pale pink on the other two. For the blue nails I added a snowflake between each next layer of sheer blue, with different numbers of layers depending how dark the polishes were. The stamping plate used was Mo You London's Noel 08. For my thumb and ring fingernail I made decals using my Uber Mat and Uber Chic's Happy Christmas stamping plate, you can see how here. Given the background is so pale I wonder if I should have done them in black, but never mind! 

Overall I'm not crazy about these, the snowflake nails are fun but the snow globes don't stand out that well. They're OK though, and I am enjoying the wintery vibes!
Colours used: Vintage Tee - Nails Inc, Cobalt Jelly - Cirque Colors, Indigo Jelly - Cirque Colors, Light Blue Jelly - Cirque Colors, White Stamping Polish - Rainbow Connection, Cocoa - Barry M, Indigo - Barry M, Playing Koi - Essie, Diamond Glitter - Barry M

Monday, 29 November 2021

Some well timed 1st frost nails!

Hi everyone! Got some wintery nail art to share today and I'm excited about moving closer to Christmas nail art! This look was for the Glam Nails Challenge prompt of First Frost, which was very fitting as it's just started getting frosty here in the UK and we even had some snow yesterday which is quite unusual for us in December, in the south anyway! I was totally crazy and went for a lake swim yesterday morning! I love wild swimming and I have done so in the autumn and been fine, but during frosty weather was perhaps a little too far for me!

For the first frost prompt I knew I wanted to try a beautiful look I'd seen on Pretty_Pawlished on Instagram. Mine isn't exactly the same as we had different snowflake images, but I'm really glad to finally get round to it! I started with a base of two layers of blue glitter (colours listed below pictures). I was impressed that I only needed two coats as the glitter was so densely packed. Once dry I added a glitter grabber layer, and then a layer of magnetic polish for that gorgeous colour shift! Finally, I used Mo You London's Festive 02 stamping plate to add some snowflakes towards the edges of my nails - followed by a glossy top coat.

In conclusion - I am very happy with these!! The nail polishes are simply gorgeous and combined (particularly under bright lights) they have the most stunning sparkle and colour shift! I actually bought the blue glitter because of seeing the original look on Instagram. I shall have to see with my work situation but I'd like to keep these on as long as I can!

Colours used: Lifestyle - Fun Lacquer, Fascinating - Fun Lacquer, White Stamping Polish - Rainbow Connection

Friday, 29 January 2021

Snowflakes upon snowflakes!

Hello world! Even more winter nail art to share today. I was given a snowflake stamping plate (Mo You London Festive 02) around Christmas time and have used it so much! I love that it has lots of individual snowflakes so you can easily mix and match them, I've been planning a look like this for ages as I loved my sheer Halloween nails and thought I could make a winter version with white instead of black.

I started with two coats of sheer white polish (colours listed below pictures) and then stamped a snowflake onto each nail in white. I then added another snowflake, followed by another layer of sheer white and repeated the steps a few more times. On my ring fingernail I added a couple of different silver glitters as an accent nail. Once dry I used a small nail art brush to add an outline ion the snowflake nails. I was tempted to do this in white but thought these metallic shades would give it a little something extra!

Overall I am quite happy with these, though I definitely don't love them as much as my sheer Halloween nail art, that was a triumph if I do say so myself! :D

Colours used: Allure - Essie, White Stamping Polish - Rainbow Connection, Cosmic Girl - Danglefoot Polish, Diamond Dust - Barry M, Copper Mine - Barry M, Gold Digger - Barry M, Bronze Bae - Barry M, Silver Lining  - Barry M

Thursday, 14 January 2021

Very Frosty Frosted Metals

Hey everyone! Back with some Holo Taco polishes to share with you today. I was lucky enough to be given the Holo Taco Frosted Metals collection for Christmas by my partner, and had great fun taking pictures of all their shinyness and of course trying them out on my nails! I decided to start with a skittle mani look so I could try them all at once and was impressed with just how sparkly they are. It's hard to photograph the effect properly but I don't have many metallics quite like them. I thought Fake Date (the pink one) in particular was super sparkly!

After I'd painted two coats of each polish on my nails, I used Mo You London's Festive 02 stamping plate and some white stamping polish to add a selection of snowflakes to my nails. They images come out lovely and clear and crisp, I'm really pleased with them. I finished with a glossy top coat and then had fun taking pictures! Unfortunately most of my pictures were quite blurry in the end, these ones were the best of the lot!

Colours used: Fake Date - Holo Taco, Cold Shoulder - Holo Taco, Mint Money - Holo Taco, Gift Receipt - Holo Taco, Cheap Champagne - Holo Taco, White Stamping Polish - Holo Taco

Saturday, 2 January 2021

Snowy Snow-globe Nails

Hello again! I have some more wintery nail art to share today. This one is actually from between Christmas and New Year, but I got a bit behind and wanted to post my New Year nail art on the last couple of days, so just getting round to it now! I was inspired by a nail tech/artist on Instagram with the account name The Beauty Room by Sarah. She did some absolutely stunning snow globe nail art which I knew I couldn't recreate but thought I'd try and create the same theme with the tools I have available! I'd totally recommend checking hers out they are beautifully done! Mine bear no resemblance at all to be honest, but the theme is the same!

I started with a base of metallic blue (colours listed below the pictures) and then added snowflakes from Mo You London's Festive 02 plate with white stamping polish. For my ring fingernail I created a snow-globe decal using an image from the Uber Chic Happy Christmas (Christmas 04) plate. After applying all the nail art and a matte top coat to my nails I stuck on some gems while the top coat was still wet. I then added another layer of matte top coat to seal them in, and a little blob of glossy top coat on top of each gem to bring the shine back! I also added a couple of layers of glossy top coat over the snow globe to make it look more glass like. It didn't have as strong of an effect as I would have liked, but was a nice touch all the same.

Overall I have mixed feelings. I know they were never going to be like Sarah's ones, but I thought I'd like them a bit more than I did. I think I'd have really liked them if I'd managed to get them a bit neater, not smudged the snowflakes on the thumb with the top coat (my matte top coat is awful for that!) and if the polish had come out a bit better. I'm blaming my matte top coat, definitely need a new one, it's just not quite matte enough and very smudgy!

Colours used: Aruba Blue - Essie, White Stamping Polish - Rainbow Connection, Gold Digger - Barry M, Say Love - ILNP, Cream Soda - Barry M

Wednesday, 16 December 2020

Reindeer and their arctic friends!

Hey everyone! Super excited to share todays nail art with you as I'm really happy with how it came out. This look was a bit fiddly and took ages but it was so worth it - the little creatures are so cute! (if I do say so...). Today's Glam Nails Challenge prompt is reindeer. I have a new stamping plate from Mo You London (Noel 11) which has 8 animal layering images, so you can create the animals in their own little festive outfits! I decided to make today's reindeer prompt 'reindeer and friends' and added a few more arctic creatures to the look. I was particularly excited to try out the walrus image. Honestly not sure how I will bring myself to take these off!

I started with a base of ILNP's Christmas Cookie (full colour list below the pictures) and then got to work on the layered images. Often it is simpler using layered images as you don't have to wait for decals to dry and trim them down etc, but this one was a little more fiddly! This is because I was using so many different colours, so I had to keep swapping colours in and out and cleaning the stamping plate too. Still, it's a great way of creating images that I definitely couldn't do freehand! On the thumb I used some of the colours from my other nails to add snowflakes with images from the same plate.

So I totally love them! I pretty much followed the templates for these colour wise as it was my first time trying them, but I look forward to trying out some variations, particularly of the walrus image! I'm also keen to try the other animal images on the plate too, though these are my favourites.

Colours used: Christmas Cookie - ILNP, Indigo - Barry M, White Stamping Polish - Rainbow Connection, Black Stamping Polish - Dance Legend, Grey - Barry, Red Hot Rio - OPI, Acai Smoothie - Barry M, Beach Hut - Models Own, Cappuccino - Barry M, Block Your Green - Rimmel, Cocoa - Barry M, Cyan Blue - Barry M

Sunday, 1 December 2019

Stamping Sunday: Snowflake Time!

Hey everyone and happy 1st of December! Today I bring to you my first Christmassy nails of the year (or wintery if you're not ready yet!). I went for something that was more wintery than Christmassy as I did do them a few days ago, but Christmas stamping plates were used!

The two main colours I used were from Barry M's new(ish) Crystal rock collection, and I was super impressed with them! The white is so perfect for snowmen and snowflakes, and the blue is gorgeously sparkly! I used a shiny top coat for this look but the polishes look amazing with their textured finish too. For the snowflake nails I painted them white and then added a top coat to make them a bit smoother for stamping. I used a black stamping polish to add a reverse snowflake image over the top. For the snowmen I used the reverse stamping technique and my Uber Mat, and finished off with another layer of top coat once done! Both images are from the UberChic Christmas 01 stamping plate.

So are you all set up with your tree  and Christmas nails now or do you prefer to wait a bit longer? We're doing our tree next weekend but the nail art is in full swing and I think I shall get the Christmas socks out too! I'm really pleased with how these turned out and thing it's a good start to this years Christmas nail art!
Colours used: Flourite - Barry M, White Moonstone - Barry M, Black Stamping Polish - Rainbow Connection

Monday, 15 January 2018

A Winter Pond Mani - Snowflakes

Hi everyone! Today I am sadly presenting to you an index finger nail that just doesn't look right next to the rest! There was an incident with a potato peeler... I filed them all down a bit but couldn't quite bring myself to make them as short as that one. Couldn't quite get the shape right either, but never mind, the show must go on!

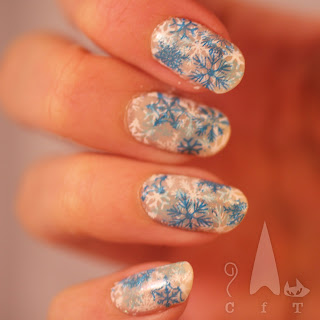
Today's nail art is a very wintery pond mani. I had been meaning to do something like this in the run up to Christmas but I think it also works in January. I started off with three coats of Essie's Allure, a sheer white which was a little more sheer than I wanted it to be. Next I used white stamping polish to apply a snowflake pattern from the Uber Chic Christmas-01 plate.

Next to make this a pond mani, I applied more of the sheer white polish. To be a true pond mani I would have kept layering up the white base and snowflakes, but I thought that might just make it look like lace and less like snowflakes. So I applied some more snowflakes in pale blue. For these I didn't use the whole image, I just selected one of two flakes at a time and positioned them on each nail. I used a dotting tool to remove excess snowflake from the stamper. I followed the same process for the darker blue snowflakes.

I finished off with a shimmery topper which was really hard to see unless in really bright light! It was too subtle for the camera to pick up too, I think it'll work better over darker colours. Overall I liked this design with it's multi layers, and slightly see through look, it's as if it had been snowing on my nails!
Colours used: Allure - Essie, White Knight - Mo You London, Blueberry - Barry M, Cobalt - Barry M, My Private Rainbow - ILNP