Showing posts with label Painted Polish. Show all posts

Tuesday, 25 April 2023

A Reflective Rainbow

Hey space turtles! Something fun and bright to share today - rainbow nails. This was for a Glam Nails Challenge prompt on Instagram but is also something I'd been meaning to do for a while with my new rainbow reflective glitters (colours listed below pictures). 

I started with a nude base coat for opacity as I knew there's only be one layer of sparkly polish. I then used a small nail art brush to add the striped on my nails one colour at a time. This was easier and came out neater than I expected as the consistency of these polishes is so perfect for it. Reflective glitters tend to be quite opaque and thick so it worked really well. I loved looking at these gorgeous glitters sparkling in the sun too! All of the colours are from the Painted Polish 'At Sea: Rainbow Reef' collection except the red as that wasn't in stock where I buy my indie polishes. The red is from the same brand and finish however so is close enough I think, just slightly darker. Love how these came out :)

Colours used: Soft Focus (nude) - Polished for Days, You Razz My Berries, Shell We Dance, Catch Sun Rays, Can't Kelp Myself, Laguna Matata, Feelin' Knotty - All Painted Polish

Sunday, 6 March 2022

Nail Art Views From The Rooftops - London

Hey everyone and happy Sunday! Got something a little different to share today. I'm currently seconded to another company at work and they have this amazing roof garden! I'm trying to make the most of it while I'm there, it's so beautiful and very refreshing in the wind and cold weather. I decided to use my London nail polish from Picture Polish and create some London themed nail art I could photograph while there. It's not the same bit of skyline but still awesome! I can see Big Ben where I usually sit in the office which is really cool, but it's pretty distant so hard to photograph.

So onto the nail art. I started with three coats of silvery grey and then made decals using Mo You London's Scandi 03 and Scandi 01 stamping plates. While these were drying on my Uber Mat I added a bit of skyline nail art to my thumb with the clairestelle8 stamping plate from Maniology. I decided to place the images facing upwards from the cuticle like I used to, pretty much because of the skyline pictures I knew I wanted to take. It did feel strange going back to that as I'm used to having them the other way round now (except on my thumb).

In conclusion, I've enjoyed these. They are great fun and I love the base colour. It's not my favourite nail art I've done but it's fun and I love the pictures I ended up with! They will certainly bring back fond memories :)

Colours used: London - Picture Polish, Black Stamping Polish - Dance Legend, Madder - Cirque Colors, Cream Soda - Barry M, Tickled Taupe - Painted Polish, Taupe Temptation - Painted Polish

Wednesday, 24 November 2021

Edwin Coffee Fangirl Nails!

Edwin Cawwfee! This is a somewhat obscure reference to a podcast I love listening to while I cook - the Off Menu podcast with Ed Gamble and James Acaster! Edwin Coffee is a coffee addict from New York who appeared when Ed was doing accents. For today's Glam Nails Challenge theme (coffee) I decided to do some Edwin Coffee fangirl nails!

I started with a base of cream, brown and sparkly taupe (colours listed below the pictures). I then created decals for my middle two fingers and thumbnail. The middle two decals were made using Mo You London's Cookbook 04 stamping plate - you can see how here. I don't even drink coffee but this plate was a hand me down from a friend who doesn't really do nail art anymore! The images were slightly short for my nails so I added a little frame which I really like on my ring fingernail. I used the same plate to add the pattern on my other two fingernails. As you can probably tell I free-handed the thumbnail!

In conclusion I actually rather like these! They are fun and strange and quite different to other things I've done. I'm really enjoying this nail length too. The ring fingernail is definitely my favourite.

Colours used: Cappuccino - Barry M, Cream Soda - Barry M, Taupe Temptation - Painted Polish, Red Hot Rio - OPI, Black Stamping Polish - Dance Legend, White Stamping Polish - Rainbow Connection, Cocoa - Barry M

Friday, 8 May 2020

A Floral Attempt at Layered Stamping

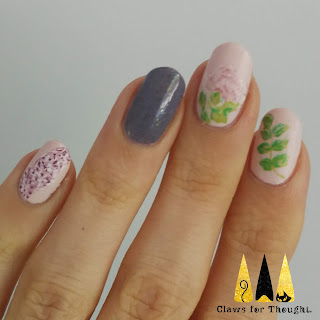
Hi everyone. hope you are staying well! This week I have managed to squeeze in some extra nail art besides the Holo Taco challenge entries I'm doing each week. I was pleased to do this as the pink base and grey/mauve are polishes I hadn't tried yet so was keen to give them a go (colours listed below the pictures). So for this look I used the Botanical 10 stamping plate from Mo You London. This was also an untried stamping plate, and features a lot of layering images which is something a little different for me.

I have used layered stamping before but it's not something I've done often, I usually use the advanced stamping technique and create decals. I found the leaf images really satisfying to do, the colours came out well and it was so easy to get am image that looks like it was more cleverly done! With the rose and buddleia flowers I was a little unsure where to start and which shades to use for which layer of the image. I think the buddleia flowers worked well, but the rose as you can see was very faint! I should have used darker colours obviously, and possibly layered them differently, so that I know for next time! Unfortunately you can no longer see plates that have sold out on MYL's website, which is a shame as I think they used to have something with this one that showed how to layer them. Still, practise makes perfect I suppose!

I finished with a shiny top coat over the accent nails, and a matte top coat over the plant nails to make the colours stand out. I've enjoyed these, they are delicate and Spring appropriate and work friendly too (not that it matters right now!). I'll be rocking these till probably Sunday when I hope to take part in the next Holo Taco challenge.
Colours used: Vintage Tee - Nails Inc, Bust A Mauve - Painted Polish, Key Lime - Barry M, Spring Green - Barry M, Cocoa - Barry M, Seymour Walk - Nails Inc, Wardour Street - Nails Inc, White Stamping Polish - Rainbow Connection, Oasis - Barry M, Surfboard - Barry M, Acai Smoothie - Barry M

Saturday, 3 August 2019

Snazzy Snake Print Nails!

Hi nail people! Hope you're having a good weekend. I am feeling nice and relaxed after a couple of days off, Thursday to be a bridesmaid at my bestie's wedding, and Friday to chill out and go for afternoon tea with a couple of friends. The nail art I'm sharing today is not from the wedding, I was in a lilac dress so this wouldn't have gone with it! It's from a week or so ago and was my first use of the new Uber Chic Wild Luxury/ Cold Blooded stamping plate. I was inspired by an umbrella I had a few years ago and was quite fond of. It had a grey snake print pattern and a neon yellow round handle.

I started of with a base of pale grey (colours listed below the pictures), then chose a couple of images from the Wild Luxury plate, and stamped them onto my nails in grey. Using the same images and black stamping polish I applied the images again, slightly above or below the grey pattern, to give it some more depth. For the neon triangles I used my Mo You London Holy Shapes 03 plate. I took one of the images and each time I stamped it I removed any of the lines around the triangle shape from the stamper with a dotting tool, before adding them to my nails. As there was a dark background, I stamped it in white stamping polish first, then the neon yellow afterwards. Finally I finished it off with a matte top coat

I was pretty pleased with how these turned out though they were a bit messy on my left hand, so if I do it again I'll try and neaten up the images a bit before stamping. I have some more ideas in my mind to try with the Wild Luxury stamping plate so hopefully will be sharing those soon. Thanks for reading!
Colours used: White Hose Street - Nails Inc, Grey - Barry M, Midnight Mischief - Painted Polish, White Stamping Polish - Emily de Molly, Daisy - Cirque Colors

Saturday, 13 April 2019

Owls & Feathers - Come On Spring!

Hey everyone - hope you are about to have a great weekend! Today my nail art has been created for the clairestelle8 nail art challenge on Instagram. There are a number of prompts for April, and for this months challenge there is the chance to win a stamping plate which I'm really keen to get my hands on! I'm not doing every prompt as I don't have enough time sadly, but will try and do a few. For this one the prompt is feathers, so I decided to use my Nails Inc feather polishes, some feather stamping and a great big owl!

On all my nails I used a pale pink base (colours listed below the pictures), and on my ringer finger and thumb nails I created decals using my Uber Mat. The owl is from an Uber Chic stamping plate, it's an image I haven't used before. I enjoyed using my Painted Polish by Lexi taupe polishes for this but you know you have a lot of polish when you happen to have the right sparkly shades for an owl!! I used feathers from a Mo You London Explorer plate for my other decals. I coloured them in with the feather effect polishes I used on my other nails. This didn't work all that well as it made the decals quite chunky, but I quite like the subtle effect.

The remaining three nails on each hand were topped with the Nails Inc feather effect polishes. With hindsight I think I should have layered the feathers up a bit more for a better effect. All in all I quite like these, but they're not my best. Not sure I was ready for pastels quite yet!
Colours used: Pink Lemonade - Barry M, White Stamping Polish - Emily de Molly, Midnight Mischief - Painted Polish, Cream Soda - Barry M, Yellow - Barry M, Tickled Taupe - Painted Polish, Taupe Temptation - Painted Polish, Brighton (Feathers) - Nails Inc, Cornwall (Feathers) - Nails Inc, Henley (Feathers) - Nails Inc

Monday, 28 May 2018

Dance Legend Wazowski Leaves

Hello nail world - it's been too long!  These are my nails from the early May bank holiday (that's how behind I am!). I'm working through a list of untried polishes, and have banned myself from buying any more till I've tried them each at least once. I'm enjoying it more than I thought as I love trying new polishes and thinking of what to do with them nail art wise.

I did these nails in our little country cottage at Symonds Yat while away for the bank holiday, so they bring back fond memories! That's also the reason for the different picture background, which I think does happen to fit with the nail art quite well. I used Dance Legends Wazowski on all nails except my ring finger, and stamped a leaf image in black from Uber Chic's Lovely Leaves 01 plate. On my ring finger I used a pale shimmering taupe, and made advanced stamping decals (see how here) using Wazowski again.

Overall I like these as Wazowski is such a lovely polish, but I do think my nails were getting a bit too long  here.
Colours used: Wazowski - Dance Legend, Tickled Taupe - Painted Polish, Midnight Mischief - Painted Polish

Tuesday, 10 April 2018

Isambard Kingdom Brown Owl

A big sleepy hello to anyone reading this... today I am sharing some owl nail art, appropriately as it's dark outside and I'm sleepy! I was inspired by a trip to The Hawk Conservancy Trust to dig out my UberChic owl stamping plate, and do some owl nail art over a colour changing background (recently got some new thermals which I'm enjoying trying out). This one is Hook from Femme Fatale Cosmetics. I think it has a sort of dusk and dawn effect, which is again very appropriate for owls!

For the wording I stamped it in gold before stamping it again in black slightly below the gold. You can't really see it in the pictures but it has a subtle shadowing effect. For the owls I used a couple of polishes from Painted Polish by Lexi's new Taupe collection, which I still haven't got round to trying out in full! I used the advanced stamping technique with my Uber Mat for the owls, you can see how here, and finished off with my favourite glossy top coat (Nails Inc's Kensington Caviar).

I was really pleased with these, they had all the novelty of colour changing thermal polish (it just never gets old!), plus nail art and a little bit of glitter. What more could I want?! Below you can see the nail art on warm hands, a bit colder at the tip of my nails, and underneath are a couple of pictures to show the cold shade.
Colours used: Hook - Femme Fatale Cosmetics, Midnight Mischief - Painted Polish, Tickled Taupe - Painted Polish, Taupe Temptation - Painted Polish, Bright Lights - Barry M
And if you've ready all the way to the bottom... the strange blog post title is a pun my oh so witty boyfriend though of based on the famous engineer from the 1800's, Isambard Kingdom Brunel. You're welcome ;)

Wednesday, 27 December 2017

Trondheim Inspired Christmas Nails

Hello everyone, hope you've had a lovely Christmas break! Today I'm sharing with you my nail art from the week before Christmas, inspired by our weekend break in Trondheim, Norway. I would highly recommend a Christmas trip there, it was like a magical Christmas wonderland! We were lucky that it snowed a fair bit, making it even more picturesque. There were Christmas lights everywhere and there was a rustic cosy theme at many places. We spent a fair bit of time at the Christmas market in the town square. The market stalls were adorable and it was a good size of market to have enough to look at without it being so big you'd get lost! There are pictures up on my Instagram if you'd like to see (link in the top right corner).

So for the nail art I based it on things we'd seen, lights on my index finger, snowy mountains on my middle, snow on my ring finger, trees and hills on my little finger, and Christmas jumper patterns on my thumb. I used the Uber Chic Christmas-01 plate for the lights, snowflakes and jumper pattern. For the hilly scenes I used the appropriately named Scandi 01 plate from Mo You London. I used the advanced stamping technique with my Uber Mat for those images where the colours have been filled in. You can see how here.

I was pleased with how they turned out and they bring back fond memories :)
Colours used: Succulent Garden - Cirque Colors, Surfboard - Barry M, Glacier Blue - Cirque Colors, Midnight Mischief - Painted Polish, White Knight - Mo You London, Estate - Cirque Colors, Grey - Barry M, Alpine Snow - OPI, Spring Green - Barry M

Sunday, 14 May 2017

Stamping Sunday: I don't know what to call this!

Having writers block with what to call this nail art, so I've gone for a very honest blog title! I ended up thinking of this design because I had a lovely blue glitter, and grey/black metallic I wanted to use and hadn't tried yet, and the combination worked better than I has expected, took me a long time to change these!

So on my thumb and little finger nails I used Black Diamond from Nails Inc , and on my middle fingers I used Saltwater Summer from Painted Polish. I was pleasantly surprised by both of these. The glitter was fuller coverage than expected so didn't need to be sponged on.

For the accent nails I used a white base, and then made decals on my Uber Mat (you can see how here) using my Holy Shapes 03 stamping plate from Mo You London. I filled them in with the same polishes I used on my other nails, stuck them down and used a glossy top coat (Nails Inc's Kensington Caviar) to finish off.
Colours used: Black Diamond - Nails Inc, Alpine Snow - OPI, Black Knight - Mo You London, Saltwater Summer - Painted Polish

Sunday, 30 April 2017

Painted Polish - Kelli's Birthday Bash Duo

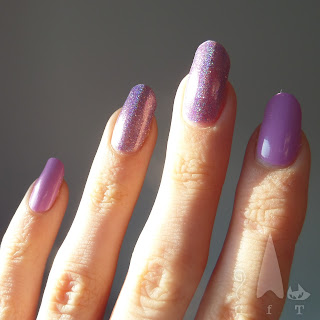
Happy Sunday all! Short blog post today. Just wanted to share my thoughts on Painted Polish by Lexi's lilacy 'birthday bash' due. I know there are many reviews of this already, but the pictures are pretty so I had to share them! The duo consists of a pastel creme polish, Take The Cake and a matching shimmering holographic, Counting Candles. They're not the sort of shades I'm typically drawn too, but I saw a lot of gorgeous pictures of these all over social media and it wore me down!

I absolutely adore Painted Polish's holographioc glitters, but these were the first creme, or normal holo polishes I tried from this brand, I have to say they didn't dissapoint. Take The Cake (the creme) had good coverage and smooth finish. I found this to be a really flattering shade for my skin tone.

The holo, Counting Candles is a little more sheer but still covers well. It's lovely and elegant polish and goes brilliantly with Take The Cake. I think they'll be great for some spring nail art.
Colours used: Take The Cake - Painted Polish, Counting Candles - Painted Polish