Showing posts with label Pink. Show all posts

Tuesday, 18 April 2023

Donut Swap!

Hello again! More catch up today. This donut nail art was inspired by 'a bit of glitz on the tips' on Instagram, who had been inspired by 'isolated.color'. We agreed to do a 'mani swap' where we each chose one of each others designs to recreate and I liked this one as it was achievable for me to do freehand (a lot of hers are more intricate and a bit tricky for me!) and fits with the general sweet things around Easter time theme. 

I started with a base of bright pink (colours listed below pictures) and then added a bit of brown to represent the donut. This colour was a bit too dark and looks more like chocolate or a burnt donut but I stuck with it! I added a matte top coat to the brown part to differentiate it more from the icing. I then used a small nail art brush to add a variety of sprinkles. Someone did ask me if it was a donut so it must have worked! These were good fun and I enjoyed our mani swap :) 

Colours used: Bikini Bombshell - Wikkid Polish, Cappuccino - Barry M, Joyful L'il Jellybean - Wikkid Polish, Hello Sailor - Wikkid Polish, My Mate Illuminate - Wikkid Polish

Monday, 20 February 2023

Hungry Like the Wolf

Hi space turtles! I have only called this blog post 'hungry like the wolf' as it is very much in my head as I look at this nail art! This look continues the Valentines Day theme of animals that mate for life - this time I chose grey wolves, I liked the idea of them howling to each other in the forest to find each other. I spend quite a while deciding what colour to do these and am really pleased with what I chose.

I started with a base of pale muted pink. Once dry I created a gradient using a sponge and the same pink, a slightly less muted pale pink (which created a lovely transition I think) and a medium pink. I then added a layer of magnetic silver nail polish for a sparkly effect which looked great in real life but you can't see that well in these pictures! Next I added images from Mo You London's Noel 06 stamping plate to depict a night sky, mountains, wolves and paw prints. To get the wolves facing each other I used the same image, but one was stamped directly onto my nail and for the other I made a decal. I think they do look slightly different even though they're the same image. Probably just to do with what's around them.

Really pleased with how these came out. My best gradient yet! Only bit I'm not so keen on is the thumb as I chose one shade of pink which is too bright, but at least the rest looks good!

Colours used: Pink Lemonade - Barry M, Acai Smoothie - Barry M, Essential White - Uber Chic Beauty, Black Stamping Polish - Dance Legend, Platinum Diamond - Fun Lacquer

Friday, 15 July 2022

Flamingoals

Hey space turtles! More catch up Glam Nails Challenge nail art today as per usual! This prompt as you can probably guess was flamingo's. I had a couple of different stamping plate options (although I forgot about one of them till afterwards) so went with a couple of images from Mo You London's Tropical 06 stamping plate which has various images of tropical birds.

I started with two layers of  white/cream on my middle two nails and coral on the others (colours listed below the pictures). I then used my Uber Mat to create a decal for the flamingo nail. I had to Google them to see what colour the beak should be and am pleased with my choice of a peachy metallic. While this finished drying I added the flamingo silhouette image on my ring fingernail in black, The image is a little small for my nails so I filled the gap with green to match the leaves on my other nail, and added a little basic gold detail. I finished the look with a glossy top coat though I am tempted to try these in matte.

I like these they're definitely growing on me. I'm enjoying the fun summer colours and I like my nails this length (they'd got a little too long so I filed them down a bit).

Colours used: Sloane Avenue - Nails Inc, Black Stamping Polish - Dance Legend, Yellow - Barry M, Spring Green - Barry M, Peachy Feels - Barry M, Gold Digger - Barry M

Saturday, 23 April 2022

Butterfly's All Over

Hi there! I'm pretty late posting this, bit pretty tired lately and busy with work etc. I did this freehand butterfly nail art for the Glam Nails Challenge butterfly prompt and followed a tutorial on Instagram. I decided to go for a bit of a skittle effect with different Barry M Under The Sea toppers.

I started with a couple of coats of neon pink, and then a couple of coats of shimmery topper on each nail (colours listed below the pictures). Once dry I used a striping brush and black nail polish to add the lines. I then used the brush from the polish bottle to fill in the area at the top of each nail. I then used a dotting tool (two different sizes) to add the white spots over the black. I finished the look with a glossy top coat.

I'm honestly so pleased with how these came out! If I'd known how nice they'd be I'd have done them for my sisters wedding at the weekend! I had a cobalt blue dress so they would have gone nicely. I have quite quickly ended up with some tip wear on the black but it can easily be patched up. Would definitely try this look again :)

Colours used: Bikini Bombshell - Wikkid Polish, Lady In Black - OPI, White Stamping Polish - Rainbow Connection, Butterflyfish - Barry M, Angelfish - Barry M, Seashorse - Barry M, Moonfish - Barry M

Monday, 7 June 2021

When Life Gives You Lemons Make Nail Art... Again!

I couldn't resist re-using the title for this - what else does one call a lemon themed nail art blog post?! Today's nail art is a fine example of just how much my freehand needs some work - it's always harder than I expect! I was inspired by Naileenj on Instagram and had to give this look a try! I started it on holiday in the North York Moors, sat outside on on a goat farm! I ran out of time to finish it here though so had to do the rest at home, which was probably more practical in the end.

I started with a base of neon pink on all nails except my little fingernail which I painted yellow (all colours listed below the pictures). I planned to use pens to draw onto my nail as I did when following the One Nail To Rule Them All tutorials a while ago, but I couldn't get it to work at all so used a small brush to paint on the lemons, leaves and the outline. They were definitely not as neat as I had envisaged! Still, it was an abstract look I was going for so I suppose it's not too far wrong...

Colours used: Bikini Bombshell - Wikkid Polish, Sunny Days - Rimmel, Key Lime - Barry M, Lady In Black - OPI

Thursday, 1 April 2021

Menchie The Cat & Friends

Following on from my last post I have a sort of twin look I created using Holo Taco's Menchie The Cat nail polish as my base. As with the last look I applied one layer, then sponged some on then applied another layer. The thumb nail is a little different as I ruined it and had to start again, for this I added Polished For Days' Soft Focus base coat which was a great base for the glitter and meant I needed to use less to get full coverage. Unfortunately my picture below has come out blurry but I did rather like the thumb nail on this one, it reminds me of the Aristocats films!

As with the Zyler nail art I used the advanced stamping technique to create this look, you can see how here. The stamping plates I used were Mo You London's Animal 15 and Crazy Cat Lady 02. I love how ridiculously sparkly this nail polish is. I find it's often the case with holographic glitters than the pale or silver ones are the most wildly glittery - this one certainly didn't disappoint! I don't think I have much else to say on this one so miaow for now!

Colours used: Menchie The Cat - Holo Taco, Black Stamping Polish - Dance Legend, Cappuccino - Barry M, Little Bo Peep - Rimmel, Cream Soda - Barry M

Sunday, 28 March 2021

Foiling Around

Hey all! Bit behind with the blogging again, not really sure why to be honest but I suppose I've had a bit more on recently - at least what feels like a bit more under the current pandemic circumstances. I took my nail polish off yesterday evening and still haven't re-painted yet which is very unlike me!

The previous weekend I decided to have a play around with some foils I have lying around as I bought some on eBay, and received a lovely set as a gift from a friend ages ago but still haven't got round to using them properly! I started with a base of pink to show through in case of any gaps, and used a peel off base too for easy removal. Once the polish was dry I added a layer of foil glue and waited for it to turn clear, indicating it had dried. My first attempt didn't really come out at all, I wonder if it wasn't fully dry yet (seen at the very bottom left of the pictures). However I was pleasantly surprised with the rest! The foil came out covering most of each nail, and the gaps where easy to patch up by re-applying the foil to my nails with a bit of pressure. I re-applied glue to my thumb nail and tried again and it worked reasonably well too.

So I know these aren't the neatest, but for a first try I'm pretty pleased with how well it worked - anything could have happened! I'm not a big fan or the base colour of this foil to be honest but I thought if I'm just experimenting I'll use my least faves! I've included a picture of the foil below to show how well each nail applied in (nearly) one piece!

The below pictures show a couple of things that didn't go well. On the left as mentioned above was my first attempt at the thumb. On the right is what happens if you apply a regular top coat... I applied a water based top coat to the foils so they would keep their shine. This worked however it didn't really last and the foils got damaged pretty quickly. However over the top on the thumb I thought I'd try a regular top coat thinking the water based one would act as a barrier to the foil, but it did not! Next time I think I'll just try more than one coat of the water based one.

Sunday, 20 September 2020

Stamping Sunday: Snazzy Cactus Nails!

Hello nail art people and happy Sunday! Got some pretty sparkly nail art to share today, using a nail polish I haven't tried before. Dynamite by Fun Lacquer is a gorgeously sparkly lilacy-pink holographic glitter. I don't always go for pinks but I saw this on Glitterfingersss on Instagram and just had to have it! I used a peel off base coat and then sponged on the glitter for extra sparkly-ness! 

On top of the glitter polish I used my 'glitter grabber' nail polish from Glisten & Glow to smooth it out ready for nail art. There was no advanced stamping involved in this look, as I used only layered images from Mo You London's Botanical 09 plate. The one on my little finger kind of looks like a gherkin but otherwise I'm happy with the look. For the light brown parts of the images I did have to stamp them over twice for the colour to show over the glitter.

I really enjoyed this look and didn't want to take it off! In the end there was a big crack on my thumb nail where it looked like the nail polish was about to peel off so I removed it just in case - on to the next!

Colours used: Dynamite - Fun Lacquer, Key Lime - Barry M, Green Park - Nails Inc, Cappuccino - Barry M, Cocoa - Barry M, Black Stamping Polish - Rainbow Connection, White Stamping Polish - Rainbow Connection

Wednesday, 15 July 2020

Tropical Pink Nails

Hello all! Hope all is well and you're enjoying some sunshine, it's not been that sunny here but it's set to be warmer the next few days so I am bracing myself! :D If it does I do have some appropriate nail art! Today's Glam Nails Challenge July prompt is Tropical, one of many prompts which works well with the new Just Beachy stamping plate from Uber Chic. I have a neon pink polish I haven't used for a while and have been eyeing up as well for summer nail art, so this seemed like the perfect time to use that too. The colours I used are listed below the pictures as usual.

For this look I started with a bright white base on all of my nails so the neon would really stand out. I then used neon pink on my index, little finger and thumb nails. On my middle two finger nails I stamped this negative space floral image onto the white polish in black, I considered making decals for these but decided to try a slightly more freehand approach as the flowers are not too fiddly. I used a small nail art brush to fill in the flowers and leaves in pink, green and orange. I forgot how much I love that neon orange too, need to find a use for that this summer as well! I feel like it maybe didn't even need the white base.

Although I'm not usually much of a pink person I do think neon pink is a great summer shade and I'm enjoying rocking the tropical flowers. Pleased with this look and also pleased I filed my nails down a bit!
Colours used: Neon Activator - Nails Inc, Claridge Gardens - Nails Inc, Audacious Green - Accessorize, Beach Hut - Models Own, Black Stamping Polish - Rainbow Connection

Sunday, 5 July 2020

Seahorses Among Coral Nails

Hi everyone, happy Sunday! So last month I took part in the Glam Nails Challenge, which involves painting your nails to match a number of prompts over the month, posting these on Wednesdays and Sundays. I don't usually do them as there are so many prompts to squeeze in, but as social activities are still limited and I am doing different nail art on each hand I've been managing to squeeze them in! So when July's prompts came out I really liked them and having enjoyed June's I decided I will do it again this month. I have already missed the first prompt for Wednesday which was corals, so have combined it with the second prompt, seahorses, for this look. Next month I might try a smaller challenge like the Dimension Nails one which has four prompts in a month but will see!

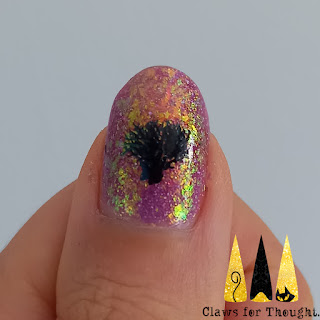
So for this look I started with a peel off base coat, and then three layers of a new polish for me, which is Woodnote from Polished for days. I don't usually go for pinks but this one is a purple-y pink and I love the gold flakies in it. For the corals I used a negative space image from my new Just Beachy stamping plate from Uber Chic which I am so excited about! There is a matching image of multiple corals that isn't negative space, and an individual coral which I put on my thumb, layering it in green then black. I also used a layering image from the same plate in green and black for the seahorses.

So I'm cheating a bit with this one as I'm doing two prompts in one, but wanted to take part and I don't want to miss any out so this is my compromise! I like this look overall though it's not one of my favourites. I do really enjoy the beautiful flakie polish!
Colours used: Woodnote - Polished for days, Watermelon - Barry M, Black Stamping Polish - Rainbow Connection

Bonus pictures here of my nails on a walk we went on yesterday morning. I enjoyed them in this light though I must admit they do look more pink here than they usually do, the first four pictures are more true to colour.

Friday, 8 May 2020

A Floral Attempt at Layered Stamping

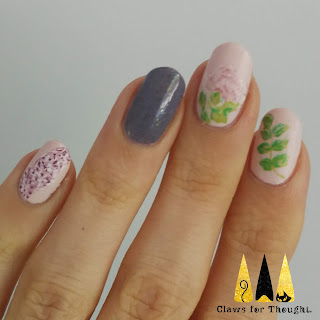
Hi everyone. hope you are staying well! This week I have managed to squeeze in some extra nail art besides the Holo Taco challenge entries I'm doing each week. I was pleased to do this as the pink base and grey/mauve are polishes I hadn't tried yet so was keen to give them a go (colours listed below the pictures). So for this look I used the Botanical 10 stamping plate from Mo You London. This was also an untried stamping plate, and features a lot of layering images which is something a little different for me.

I have used layered stamping before but it's not something I've done often, I usually use the advanced stamping technique and create decals. I found the leaf images really satisfying to do, the colours came out well and it was so easy to get am image that looks like it was more cleverly done! With the rose and buddleia flowers I was a little unsure where to start and which shades to use for which layer of the image. I think the buddleia flowers worked well, but the rose as you can see was very faint! I should have used darker colours obviously, and possibly layered them differently, so that I know for next time! Unfortunately you can no longer see plates that have sold out on MYL's website, which is a shame as I think they used to have something with this one that showed how to layer them. Still, practise makes perfect I suppose!

I finished with a shiny top coat over the accent nails, and a matte top coat over the plant nails to make the colours stand out. I've enjoyed these, they are delicate and Spring appropriate and work friendly too (not that it matters right now!). I'll be rocking these till probably Sunday when I hope to take part in the next Holo Taco challenge.
Colours used: Vintage Tee - Nails Inc, Bust A Mauve - Painted Polish, Key Lime - Barry M, Spring Green - Barry M, Cocoa - Barry M, Seymour Walk - Nails Inc, Wardour Street - Nails Inc, White Stamping Polish - Rainbow Connection, Oasis - Barry M, Surfboard - Barry M, Acai Smoothie - Barry M