Saturday, 13 March 2021

Ultra Violet Pantone Dinosaur Nails

Hi all! I'm back so soon as I have more collaboration nail art to share and it's all been posted to Instagram at once! This is my entry for this months Nail Addicts Collab. The theme was 'turn back the clock', specifically focusing on the Pantone colour of the year colours over the years. We could choose which one we wanted to do, and just add black and white for nail art. I chose 2018's ultra violet, as we did a nail art theme on this back in 2018 and I fancied trying it again with a different look this time. I decided to try out one of my new dinosaur themed stamping plates from Mo You London (Jurassic Park 02) for this look. 

I started with a base of white on my middle finger and thumb nails, and violet on the other two. I then used white stamping polish to add the leaves to the purple nails, and the purple polish to add dinosaurs on my thumb and middle fingernails. The purple stamped pretty well which I was pleased with as it's not a stamping polish, but I did mess up a bit on my thumb nail. On my ring fingernail I used black stamping polish to add the geometric pattern. Shockingly I have never actually seen the Jurassic Park films (I just happen to like dinosaurs!) so I'm not sure if this pattern from the plate really relates to them or is just for fun!

Overall I like these, the colour scheme is good and I do love a dinosaur theme! Messed the thumb up a bit but it doesn't look too bad. I'm glad this collab theme made my try out the dinosaur images in purple as I might not have done otherwise.

Colours used: Wigmore Street - Nails Inc, Floral Street - Nails Inc, Black Stamping Polish - Dance Legend, White Stamping Polish - Rainbow Connection

Friday, 12 March 2021

Party Kitty Nails!

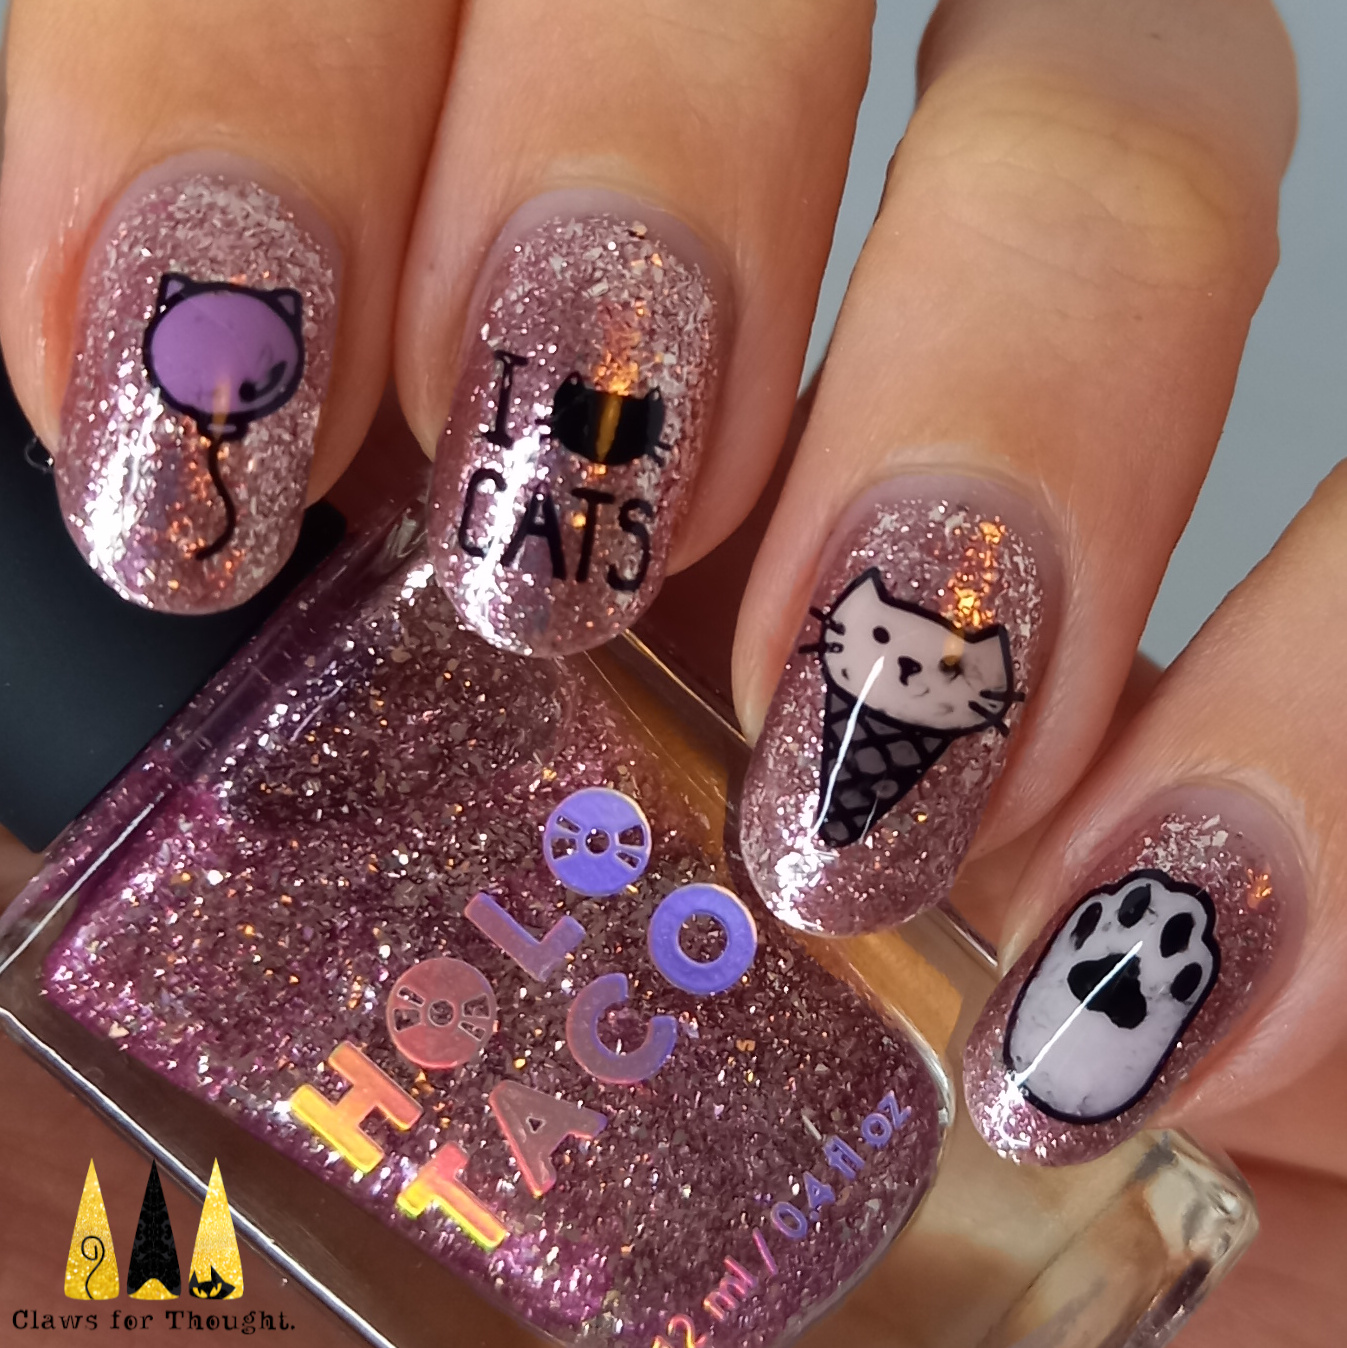
Hello and Happy Birthday to anyone who has their birthday today! Happy un-birthday to those that don't! This nail art was created for the birthday of Katie's Dazzling Digits on Instagram. She is one of the organisers of the Nail Addicts Collab which I take part in each month. This is the first birthday collab I've been involved in and I love that it's got a cat theme! I have a few cat themed stamping plates and I haven't used these awesome balloon and ice cream images yet which are perfect for a party theme!

I started with a super shiny metallic base (colours listed below images) and then stamped the 'I love cats' image onto my middle finger from the Mo You London Animal Collection 15 stamping plate. I used images from the same plate for all other thumb and fingernails except my little finger. The image on my little finger is from the MYL Crazy Cat Lady 02 plate. All coloured in images were done using the advanced stamping technique on my Uber Mat, you can see how here.

In conclusion I really like these! The base colour starts it off really nicely and I like the combination and quirkiness of the cat themed images. Definite birthday party vibes!

Colours used: Fake Date - Holo Taco, Black Stamping Polish - Dance Legend, White Horse Street - Nails Inc, Basil Street - Nails Inc, Cappuccino - Barry M, Wardour Street - Nails Inc

Saturday, 6 March 2021

Frosted Metal Crystals

Hi everyone! Back with more advanced stamping today and a whole lot of Holo Taco! It's well timed in a way as I may have just caved and ordered some of the new Holo Taco polishes! I've had Mo You London's Crystal 06 stamping plate for a while and have been deliberating the best polishes to use for it. I'm definitely going to try it with some glittery nail polish but thought these super shiny metallic shades would create an interesting look too.

I started with a pale pink base (colours listed below the pictures) for a somewhat sheer look. I then created decals on my Uber Mat (see how here) using black stamping polish and the colours from Holo Taco's Frosted Metals collection. The images I used on my middle fingernails were bigger than I'd anticipated! I think I should have placed them a little lower down so more of the pink base colour was showing. I love the witchy vibes of the image on my thumbnail.

Overall I quite like these but wonder if they'd have been better sparkly! It was good fun to use the Holo Taco Frosted Metals again though!

Colours used: Get Discovered - Nails Inc, Black Stamping Polish - Dance Legend, Mint Money - Holo Taco, Cold Shoulder - Holo Taco, Gift Receipt - Holo Taco, Fake Date - Holo Taco, Cheap Champagne - Holo Taco

Wednesday, 3 March 2021

A Winter Woodland Manicure

Hi everyone! Back with more advanced stamping nail art today, no surprises there! I bought Mo You London's Fall In Love 10 stamping plate way back in the Autumn but didn't get round to using it until now. I think it works well for winter and Spring looks too, not just Autumn! The base for this (ILNP Stay Hidden) is currently my last untried nail polish - let's see how long that lasts!

While the base colour was drying I made decals for this look, you can see how here. I wasn't really sure how it would come out as I picked colours as I went along. I'm pretty happy with my choices and I particularly like the blue tress on my thumbnail. I added a glossy top coat to complete this look et voila! I like it, I think it's a cute look and works well with the base colour. Also how cute is that teeny hedgehog?!

Colours used: Stay Hidden - ILNP, White Stamping Polish - Rainbow Connection, Cyan - Barry M, Cappuccino - Barry M, Watermelon - Barry M, Cocoa - Barry M, Uptown Glamour - Nails Inc, Pomegranate - Barry M

Friday, 26 February 2021

Fun Lacquer Platinum Diamond - A Comparison

Hello nail people of the world! Today I'm doing something a little different from my normal stamping nail art, and reviewing/ comparing a couple of nail polishes by Fun Lacquer. Back in 2020 Fun Lacquer released a new magnetic gel polish (Platinum Diamond) with a really pretty silver glitter effect that is different to any other glitter I had seen before, it has a sort of crushed velvet look to it and sparkles like crazy when you move your hands! I was waiting for it to come back in stock again on Rainbow Connection in the UK, and once it did they had also released a regular nail polish version. I had read previously that the gel one was better for getting the true 3D shimmer effect, but the pictures of the regular one look pretty good too! So I dithered over which one to get and ended up deciding to get both and compare. It seems like a waste of money in some ways but it gives me options and something to do in lockdown!

I'm going to summarise below the key points to compare and my final view, so hopefully if you're struggling to decide which to buy this might help! Underneath all the text I've added pictures, the gel polish is on my thumb and index fingernails. I've tried a few different colours underneath.

Consistency - Very good for both, not too thick in either case but just one coat needed.

Price - £14 for regular and £19.50 for gel - it's not cheap but it is worth it!

Application - The application of these was really good as usual, though I am less used to gel so probably haven't perfected that yet! I think there's a trick to getting that 3D sparkle effect which I achieved better on some nails than others, it will take some practise and is also pretty hard to capture on camera - but when it works it's wow!

Sparkle - Wonderful! I managed to achieve the sort of crushed velvet flare effect better with the gel but both are beautiful. The regular polish one had slightly closer together particles I thought.

In conclusion, I need to practise my technique with these, but I think I found the gel one slightly better. The unlimited drying time meant it was easier to get the effect I wanted before curing, and I think the sparkle effect is more unique. However, the difference is small, both are gorgeous and you have to look closely to tell the difference. It may even be that I'm just not well practiced enough in creating the effect. Therefore I would recommend choosing the one you're most comfortable working with - it will look gorgeous either way!

Colours used: Black Gel - FairyGlo, Pale Pink Gel - FairyGlo, Lady In Black - OPI, Fascinating - Fun Lacquer, Cobalt Jelly - Cirque Colors, Platinum Diamond Gel - Fun Lacquer, Platinum Diamond - Fun Lacquer

Saturday, 20 February 2021

Gothic church window nails with Zeitgeist

HellO there and happy weekend! I've had a pampering sort of morning and am now blogging and watching nail videos before lunch. Hoping to be more productive in the afternoon! I recently purchased this unusual coppery multi-chrome nail polish by Cirque Colors and wasn't quite sure what to do with it nail art wise, till I saw someones swatch where the polish looked quite gothic, so I thought I'd try out an accent nail with my Gothic 10 stamping plate from Mo You London. I love an excuse to use sheer black as well!

So I started with a base of two coats of Zeitgeist from Cirque Colors on three of my nails, and one coat of sheer black on my thumb and ring fingernails. Once dry I stamped a couple of church window images over the sheer black using black stamping polish. I love how opaque my black stamping polish is - the images come out so nice and crisp! I then added a black outline on the two accent nails with black nail polish and a small nail art brush. The outline didn't show up particularly well but still made the look feel a bit more complete.

I'm pleased with the way this turned out and Zeitgeist is so beautiful and unusual. I think it would look really good on it's own with a dark wintery or autumnal outfit. I couldn't really capture the colour shift that well but I captured the shine at least!

Colours used: Zeitgeist - Cirque Colors, Coal - Fancy Gloss, Black Stamping Polish - Dance Legend, Lady In Black - OPI

Thursday, 18 February 2021

A puffin in the snow

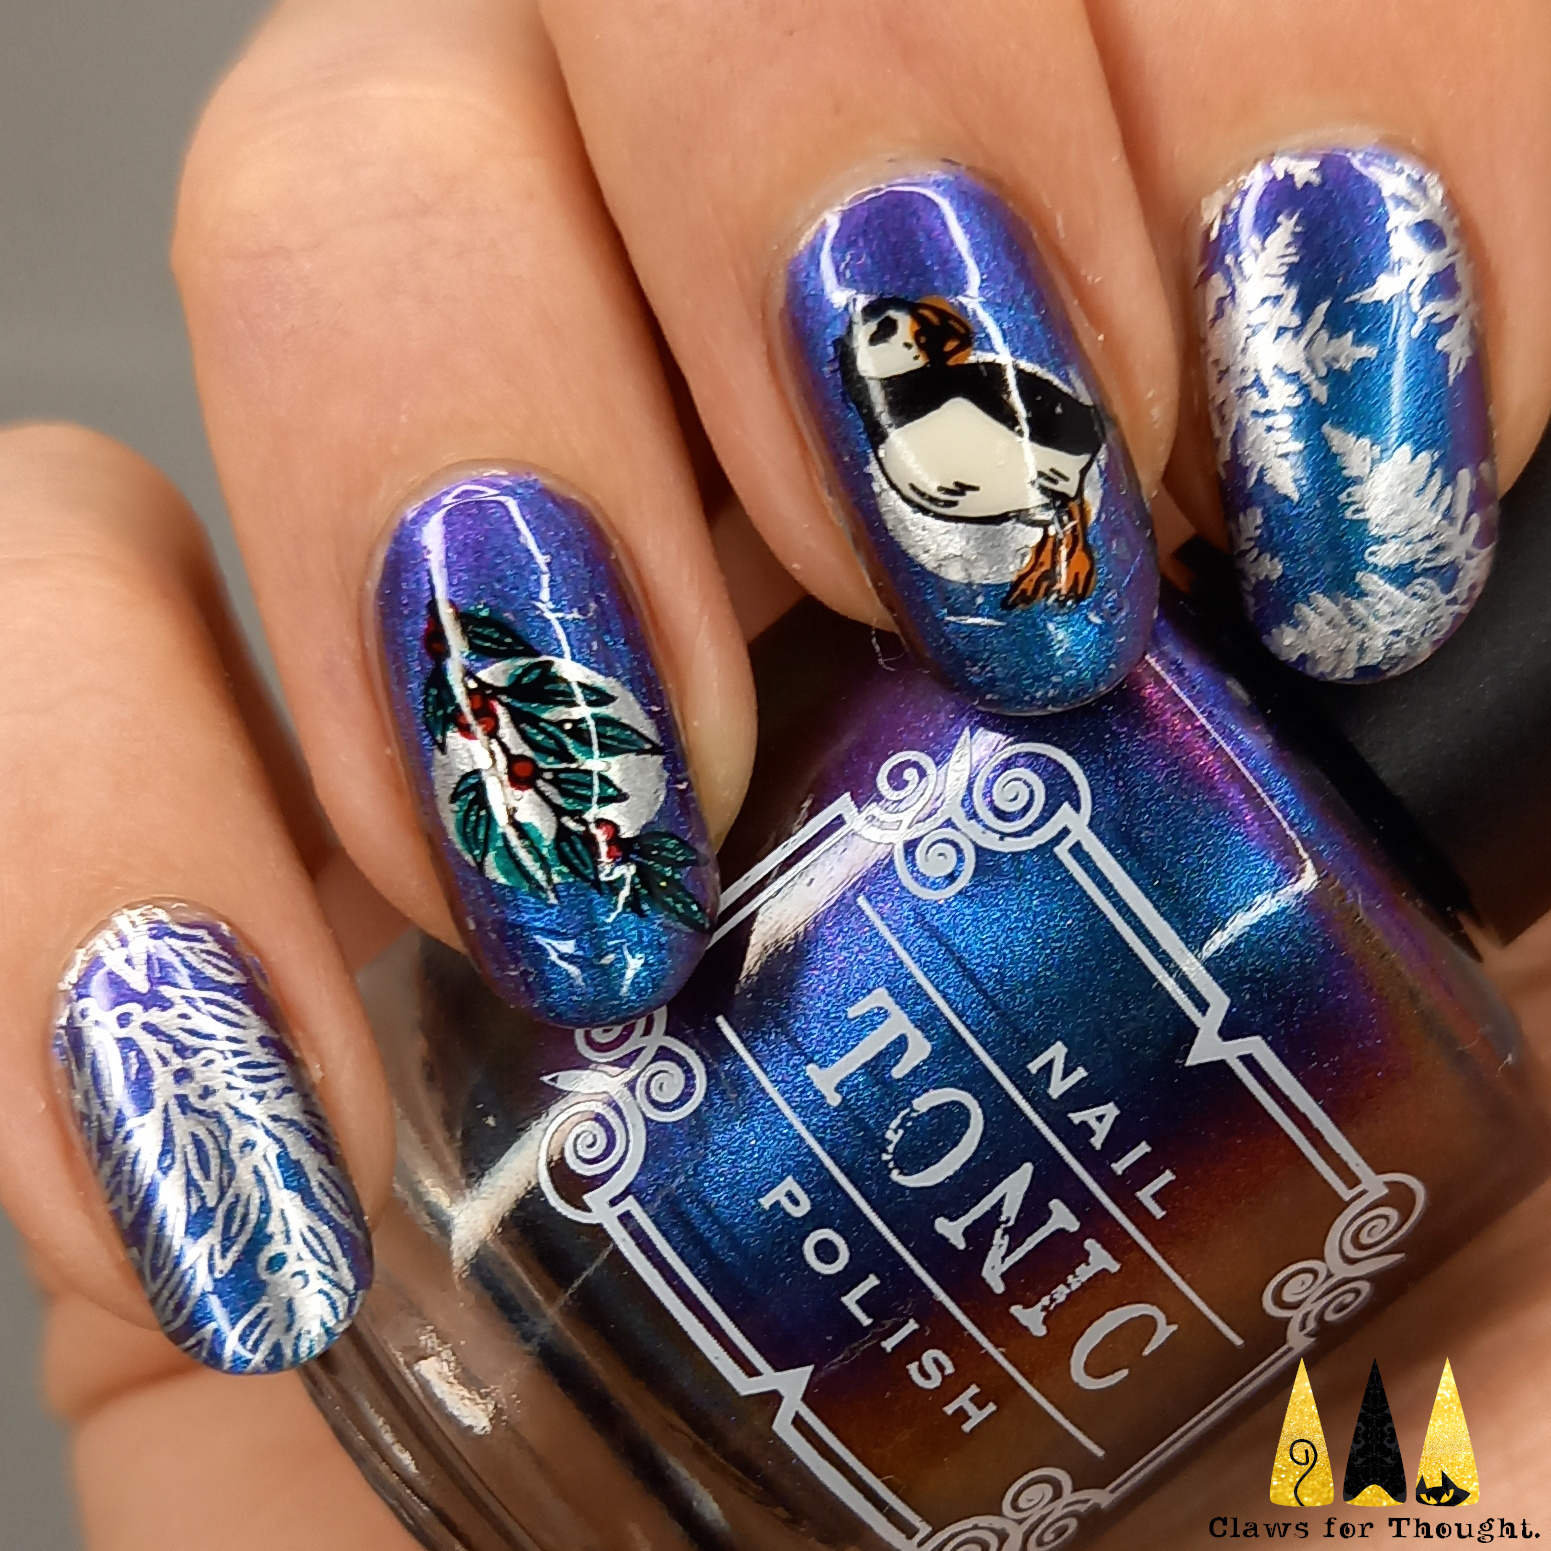
Hey everyone! Multi-chrome winter vibes today with a lovely nail polish I got in my Christmas stocking, Pixie Parade from Tonic Polish. I actually did these before my Valentines nail art but wanted to share those first so they were appropriately timed. This base polish is gorgeous and so opaque, I'm super impressed with it! I was keen to try out my Noel 08 stamping plate from Mo You London too as it has gorgeous wintery images so decided to pair them together.

After starting with a base of two coats of Pixie Parade, I created decals on my Uber mat for the puffin and branch images (why does puffin and branch sound like a pub name to me?!) - you can see how here. While they were drying I added some other cute images from the plate to my thumb, index and little fingernails in silver. I also used Uber Chic's Basic Shapes 01 plate to add a couple of circles to my middle two nails. I did this as I thought the other images might not stand out well enough against the background, which in hindsight they did, but I'm still glad I added the silver circles as I think they give the look some more depth.

I really like these. The base colour is lovely and I love the Noel 08 stamping plate, it has so many cute wintery images, I particularly like the animal ones. Looking forward to seeing what else I can create with it!

Colours used: Pixie Parade - Tonic Polish, Foil Effect in Silver - Barry M, Black Stamping Polish - Dance Legend, Evergreen - Picture Polish, Red Hot Rio - OPI, Not From Concentrate - Nails Inc