Thursday, 28 April 2016

The Switching Post: Sasha from Glamorousnails23

Hello nail world! Today I am very excited to have a guest blogger! We have decided on a theme of nature, and Sasha has chosen the best kind of nature inspired mani (in my humble opinion!) Read on and enjoy :)


Hey There!,

I'm Sasha from Glamorousnails23 and I'm glad to be on Rebecca's blog! We're a part of this group on Facebook called The Switching Post and this month Rebecca and I got paired up! The theme we decided to go with was nature. I was going to attempt some free hand but uh..I'm not even remotely close to ready for that yet lol. So instead I dug through what stamping plates I had and found some images that remind me of nature. 

The Switching Post Nature

Instead of going with trees, grass and flowers like originally thought I was going too I went with more of a nature/beach theme. All of the images reminded me of what I find/could possibly find when I go to the beach in Barbados. The blue that I used for the base is to represent the blue sky that I see on sunny days while on vacation. Now looking at this mani I should have done a gradient but oh well.

The Switching Post Nature


The Switching Post Nature
Polishes Used:
  • Duri: Rejuvacote
  • Square Hue: Waterland District
  • Nail Experiments: Easy Peel Latex Barrier
  • Mundo De Unas: White
  • Glisten & Glow: HK Girl Fast Drying Top Coat
Products/Tools Used:
  • Bundle Monster: BM-XL24
  • Clear Jelly Stamper
  • Tweezers


I hope you enjoyed my vision on nature! Don't forget to head on over by my blog (Glamorousnails23)  to see what Rebecca has in store!  
| Blog | Facebook | Instagram |
post signature


Friday, 22 April 2016

HBP Presents: Dusty Dino's!

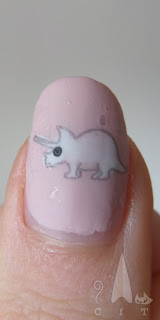
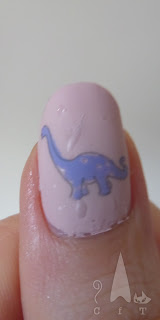
Hello nail world! Today I'm super excited to be sharing the nail design I did as part of this months Hobby Polish Bloggers Link Up. I love having a monthly theme as it gives me inspiration to try things a little differently. This months theme was dusty/muted colours, so I came up with the idea of dusty dinosaur's! I used advanced stamping for this manicure using my new Bundle Monster plate 611. I was looking all around to find dinosaur stamping plates and stumbled across my dream dino plate on Bundle Monster, so ordered it all the way from the US. It was worth the wait!

I used a grey polish to stamp the images onto my UberMat, as I thought black or white might be slightly too harsh against the muted colours. This old Grey polish from Barry M was perfect. I used a dotting tool to do eyes on some of the dino's, and then to colour them in in pale/dusty colours. Once I has placed them on my nails I used a matter top coat to finish the look. Really pleased with how these turned out, and was so sad when I had to take them off for a client meeting! I did have a few issues with a little bit of bubbling, which I have learnt from, as I'm rocking another advanced stamping mani now and it's much smoother :)
Below are close ups of a couple of the dino's and a picture of the stamping plate (excuse the reflectiveness, I struggle to get good pictures of stamping plates!). To see the colours I used, and the designs the lovely ladies of the HPB group have done please scroll past the pictures. It's a lovely and talented nail community so I would recommend you check them out!

Colours used: Pink Lemonade - Barry M, Grey - Barry M, Acai Smoothie - Barry M, Wisteria Haze - CND Vinylux, White Horse Street - Nails Inc, Swan Street - Nails Inc, Pro Matte Finish - Rimmel


Tuesday, 19 April 2016

Monthly Indie Review - Cupcake Polish

Hello nail world! For this months indie polish review I have tried Cupcake Polish. This is another US brand, but I purchased them from Rainbow Connection which distributes to the UK with very reasonable postage costs. Below are the polishes in the bottles, Berry Good Looking is on the left, and Copa Girls on the right. You can see in the bottles on the right that the colours look like they have separated a little. When I actually used them however they came out smoothly and well mixed.


First up is Berry Good Looking. This is what reeally made me want to try Cupcake Polish. I've seen a whole bunch of pictures of it on Instagram and it is just such a stunning and vibrant shade. I struggled to photograph the magical holo flare, but you can see below how bright and lovely the colour is. The polish was reasonably thick and a one coater. I wore it for four days with no chipping (even with no top coat). there was some slight rubbing away at the ends of my nails, but that does happen to me relatively often, and I was using my hands quite a lot as I was travelling and carrying suitcases etc. Removed nice and easy considering it's a holo, though this may have been helped by no top coat.

Next I tried Copa Girls, which I fell totally in love with! I had this on for nearly a week I just did not want to take it off! It lasted impressively well with no chipping or rubbing, despite having no top coat. I initially wanted to get Bluebell Girls, which is from the same collection (Vegas Showgirls Collection) but Rainbow Connection ran out and I was desperate to make my order before they ran out of something else I wanted! I chose this one and it did not disappoint (I am however dying for Bluebell Girls and Jubilee from the collection).

Anyway, back to the polish! This was a lovely consistency to paint with and was nearly a one coater, probably could be if applied thickly. I used two coats with no top coat.It was very lightly textured thought not as textured as I expected. It has a lovely combination of glitters, some holo, tiny silver glitter and little silver flakies. I would highly recommend this polish and will be purchasing more from the same collection.
So in conclusion, despite all my raving about Copa Girls, I honestly don't think I could choose a favourite of these two. They're both lovely. I love how well Berry Good Looking stood out against dark clothes, and how well they both seemed to go with things. Until next time!

Thursday, 14 April 2016

Mermazing Nails!

Hello nail world, I'm feeling mermazing today! I really enjoyed doing this nail design and wearing it. It was one of those that lasted me about a week. Eventually a few little areas starting losing little chunks of pattern so that was my excuse to try another design! I took my inspiration from Christine at Simply Nailogical on Youtube, who did this in a more pastel-y way, and a neater way!  I ended up quite liking the rustic way mine turned out too though.


I started with a white base coat, and once dry pressed on some fishtail patterned stencils. Next I watered down some acrylic paint and dabbed it onto the nails one colour at a time, with a small nail art brush. The trick is to keep it nice and liquid so that it pools around the edges a little, this didn't work perfectly on all my nails but I think in general it did the trick!

If the colour was too dark I just dabbed on some more water, and if it became to faint I added more paint. It's a good technique as you can be so rough/vague with it. I left it about a minute to dry a little, but didn't leave it too long as I didn't want to risk peeling off the design. It's important to peel up each corner and carefully work your way into the middle to reduce the risk of peeling. There were a few areas on mine that leaked out a little onto the white area. Some of this I scratched off with an orange stick, but the rest I left on for an edgier look (at least that's my excuse!).

(continued below pictures)
Above left is the design pre-glitter. Once the pattern was dry I used a light glitter (Crystal Shimmer form Accessorize) to give it a glowing finish. On my ring fingers I used some clear nail polish to stick on little silver shells I bought from She Sells Sea Shells. These lasted surprisingly well, and weren't even to tricky too prize of my nail when it was time to take off the design.

What I used: White nail polish, acrylic paint (blue, purple and green), fishtail mermaid nail stencils (from eBay), nail art brush and clean up brush, small pot of water, glitter topcoat. silver metal shells
Colours used: Alpine Snow - OPI, Blue acrylic paint, Purple acrylic paint, Green acrylic paint, Crystal Shimmer - Accessorize 

Sunday, 10 April 2016

Stamping Sunday: Baby Aztec

Happy Sunday everyone! Today's stamping Sunday post was a quick first try of the Aztec patterns on my Mo You Explorer Plate Collection 14. I don't wear a lot of pink and had never thought to combine it with Aztec patterns, (I'd usually use black and white or brights). But I had this one on from swatching and thought I'd give it a go. I like the final look, but think it could have been a lot neater. I think in future I will be more careful to get the strips of Aztec pattern more equal sizes as well.

Not much more to say on this one really! I enjoyed wearing it, and look forward to trying more Aztec designs again as spring/summer approaches.

Colours used: Pink Lemonade - Barry M, Gold Foil Effect - Barry M

Wednesday, 6 April 2016

Dance Legend - Peel Off Glitter Base

Today I'm going to talk through my first experience with a peel of base coat. It's not the sort of thing I would normally I use (I'm quite happy with the foil technique for most glitters), but I thought it might come in handy for those super stubborn glitters with large glitter particles. The peel off base I chose is by Dance Legend and was purchased on Rainbow Connection. I'd seen it well reviewed and also like the bottle! It's available in a few shades, white, black, nude and pale pink. So you can choose one that best fits with the glitters you use. I went for nude to look as similar to my nail as possible.


For my first try I didn't want to use a particularly glitter, so I went for A England's Heathcliff. The glitter particles are quite small so I knew I could revert to the foil technique if needed! On the top right is the glitter base alone, it was a very thick consistency so only needed one coat. I think it looks like gels it's so shiny!

Below you can see the process in action. On the left is Heathcliff with no top coat. It's got teeny glitter particles in a variety of colours. To remove the polish I used a wooden orange stick, and found a corner that I could wedge it under. I then slowly worked it underneath the polish to pull it up. It's quite satisfying but freaked me out a little as it looked like I was peeling off my nail!

As you can see below I had some trouble when it came to getting it off the tips of my nails (which are looking frightfully yellow due to all the glitter abuse!). I think this is because I didn't seal the ends of my nails with the peel off base, but did seal the ends with the glitter (doh!). Another mistake I made was using a normal base coat under the peel off base. If you look closely you can see there is a slight peeling on my nails, this is because the peel off base will have also pulled up the base coat underneath. Using it straight onto the nail is less risky as it acts as a base coat already,


So after all that picking (I did get it all off with the orange stick in the end!) my nails looked a little sorry for themselves. I gently buffed them and then painted them with my Charlotte Street perfect nude polish from Nails Inc, as a sort of remedy/cover up. All in all I like the peel off base, it worked surprisingly well and I think it will be more of a time saver when I'm using chunkier glitters. I'll just remember not to use a base coat next time!

Sunday, 3 April 2016

Stamping Sunday: Cathedral Nails

Today's stamping Sunday manicure I would call a kind of Gothic Easter manicure...ish! I still have a few dark colours I wanted to try before it gets into Spring colours, so quickly getting those in now! The main colour in this manicure is Jane Eyre by A England. It's a red/black with tiny flecks of red shimmer. It is so dark though that it looks black at a small distance, and a kind of chocolate minstrel brown up close. It was only really in the bottle that I could see the red.

For this design I decided to use my Uber Mat again for some advanced stamping with my Mo You Gothic Plate Collection 10. I love the stained glass patterns on this plate and was also curious to see how the face image would look (see below on my thumb - came out fairly well). I've still got a bit to learn with advanced stamping, particularly when the image covers the whole nail, but standard stamping comes easily to me now. Finally!

On my ring finger I used a white base (colours listed below pictures) and stamped an image onto my Uber Mat in gold. I used a dotting tool to colour some small areas of the design blue, and the rest in a teal/green. I did a few images to see which came out best, so when I placed them on to my nails and missed a corner, I was able to patch up the gap with part of another image/decal. I finished off with my favourite topcoat (Nails Inc's Kensington Caviar) to seal it all in.

Colours used: Jane Eyre - A England, Alpine Snow - OPI, Uptown Glamour - Nails Inc, Warwick Way - Nails Inc, Baker Street - Nails Inc

Friday, 1 April 2016

Are they apples?

Happy Friday! I really toyed with the idea of deleting these pictures. They've been sat in my nail blog folder for quite some time and I don't have any decent pictures, as it did not go to plan! But I have decided to document this anyway, perhaps then I can recreate the design and make it better in the future and can look back and it and lol! I just hope people don't come to my blog for the first time to be greeted with this!

When I finished this deign I was unsure if it looked like what it was supposed to, so I asked a few colleagues and my boyfriend what they thought they were meant to be. Sure enough, no one had any idea! Someone thought they were owls, another thought eyes, but most had no clue. They are indeed supposed to be apples! I was going for a Halloween candy apple look, with the gold glitter, and red apples, but the proportions just weren't quite right. I think to make this better and more recognisable I would have needed to make the beige inner apple areas bigger, and perhaps the stalks more prominent. I think if I do this again I will practise on paper first!

Needless to say these weren't on for long, but I suppose they still were an interesting pattern!

Colours used: Red Hot Rio - OPI, Lady In Black - OPI, Colville Mews - Nails Inc, Cocoa - Barry M, Spring Green - Barry M, Chelsea Embankment - Nails Inc