Sunday, 28 February 2016

*100th Blog Post!*

Good evening! Its been over a week since I last blogged now which feels very strange! I moved house last week and also went on a business trip to Spain so time has been a little limited and I've been missing some essential tools. Finally moved my nail polish today but it's still all contained at the moment till my desk arrives on Tuesday. Very excited to re-organise it all!

So this is my 100th blog post! I thought I'd commemorate this moment in my blog history by looking back over the things I've posted so far and sharing some favourites. I originally intended to pick just four designs to share, but have ended up only being able to whittle it down to six! Here goes:


First up is my Christmas day design, you can see the original post here. I love Christmas cards and had great fun trying to recreate one of the ones I bought for Christmas 2015. I was going to add a little Santa but decided it too fiddly.

I was really pleased with how this turned out and ended up keeping it on and wearing it for New Year too!


Next up is one from aaages ago, but was posted on my blog here on November 2015. This was my first try of Nails Inc's stunning silver galaxy glitter polish, and also featured a gorgeous Nails Inc purple and some freehand aztec patterns (with the help of a Barry M nail art pen.). So altogether this one stuck in my mind as a favourite. One I should really get round to re-creating!


I absolutely had to share this as it was my first real successful attempt at stamping and I adored wearing it. The base colour is OPI's My Car Has Navy-gation which my boyfriend got me as a surprise present. I also wore it for the 1st time on a holiday with his family, so fond memories all round!

I hope to try this Mo You Doodles stamping plate again soon with some colourful advanced stamping. You can see the original post here.


This summery design is probably one of my favourite mani's out off all the ones I've done! The design was actually copied from a couple I saw on Instagram. Unfortunately I'm unsure who did the original to credit them.

I changed the colour to a bright summery blue and used a small nail art brush for the lemons and leaves, and outlined them with a Barry M nail art pen. There are actually two shades of yellow involved but it;'s quite hard to see.

See how I got on here.


This is a reeeally old one but had to be shared as I was so so pleased with it! Design was based on one seen on Pinterest but as it was years ago I'm not sure whose.

I started with a blue gradient, and then outlined the sky line with a Barry M nail art pen. Then used a small brush to fill in the towers, and another nail art pen for the lights/windows.

If I did this again I think I could get a better gradient. Another one I hope to recreate some day. Here's the relevant blog post here. A throwback to so many years ago! (Well actually about 3 or 4 but a lot has changed in that time!


And finally, another oldish design! This was based on a mani by One Nail To Rule Them All and I enjoyed doing it plus of course the after effects! I used two pale blues for the subtle gradient and then lightly smudged some white polish on with cling film for a spray effect. Then used a small nail art brush and nail art pens for the boats and birds.

See my original blog post here. It's a really early one!


Thank you for reading! I hope you've enjoyed looking through my pictures, I certainly enjoyed making them! Might try and do this every hundred posts. Still settling into the new flat (love it!) so may be a little less active on my blog the next couple of weeks, but will try and keep up once a week, to avoid any withdrawal symptoms!

Good night :)

Tuesday, 16 February 2016

Monthly Indie Review: A England

Time for this months indie nail polish review! I aim to post these around the 20th of the month, but on the 20th of this month I am moving, so won't have much time between building ikea furniture! So glad to finally post this as I actually bought and tried them a little while ago.

Today i'm reviewing Wuthering Heights and Spirit Of The Moors from A England. Both polishes are from the 'To Emily Bronte' collection which consists of five truly beautiful polishes. It was hard to choose just two, and I can see myself ending up with them all at some stage!

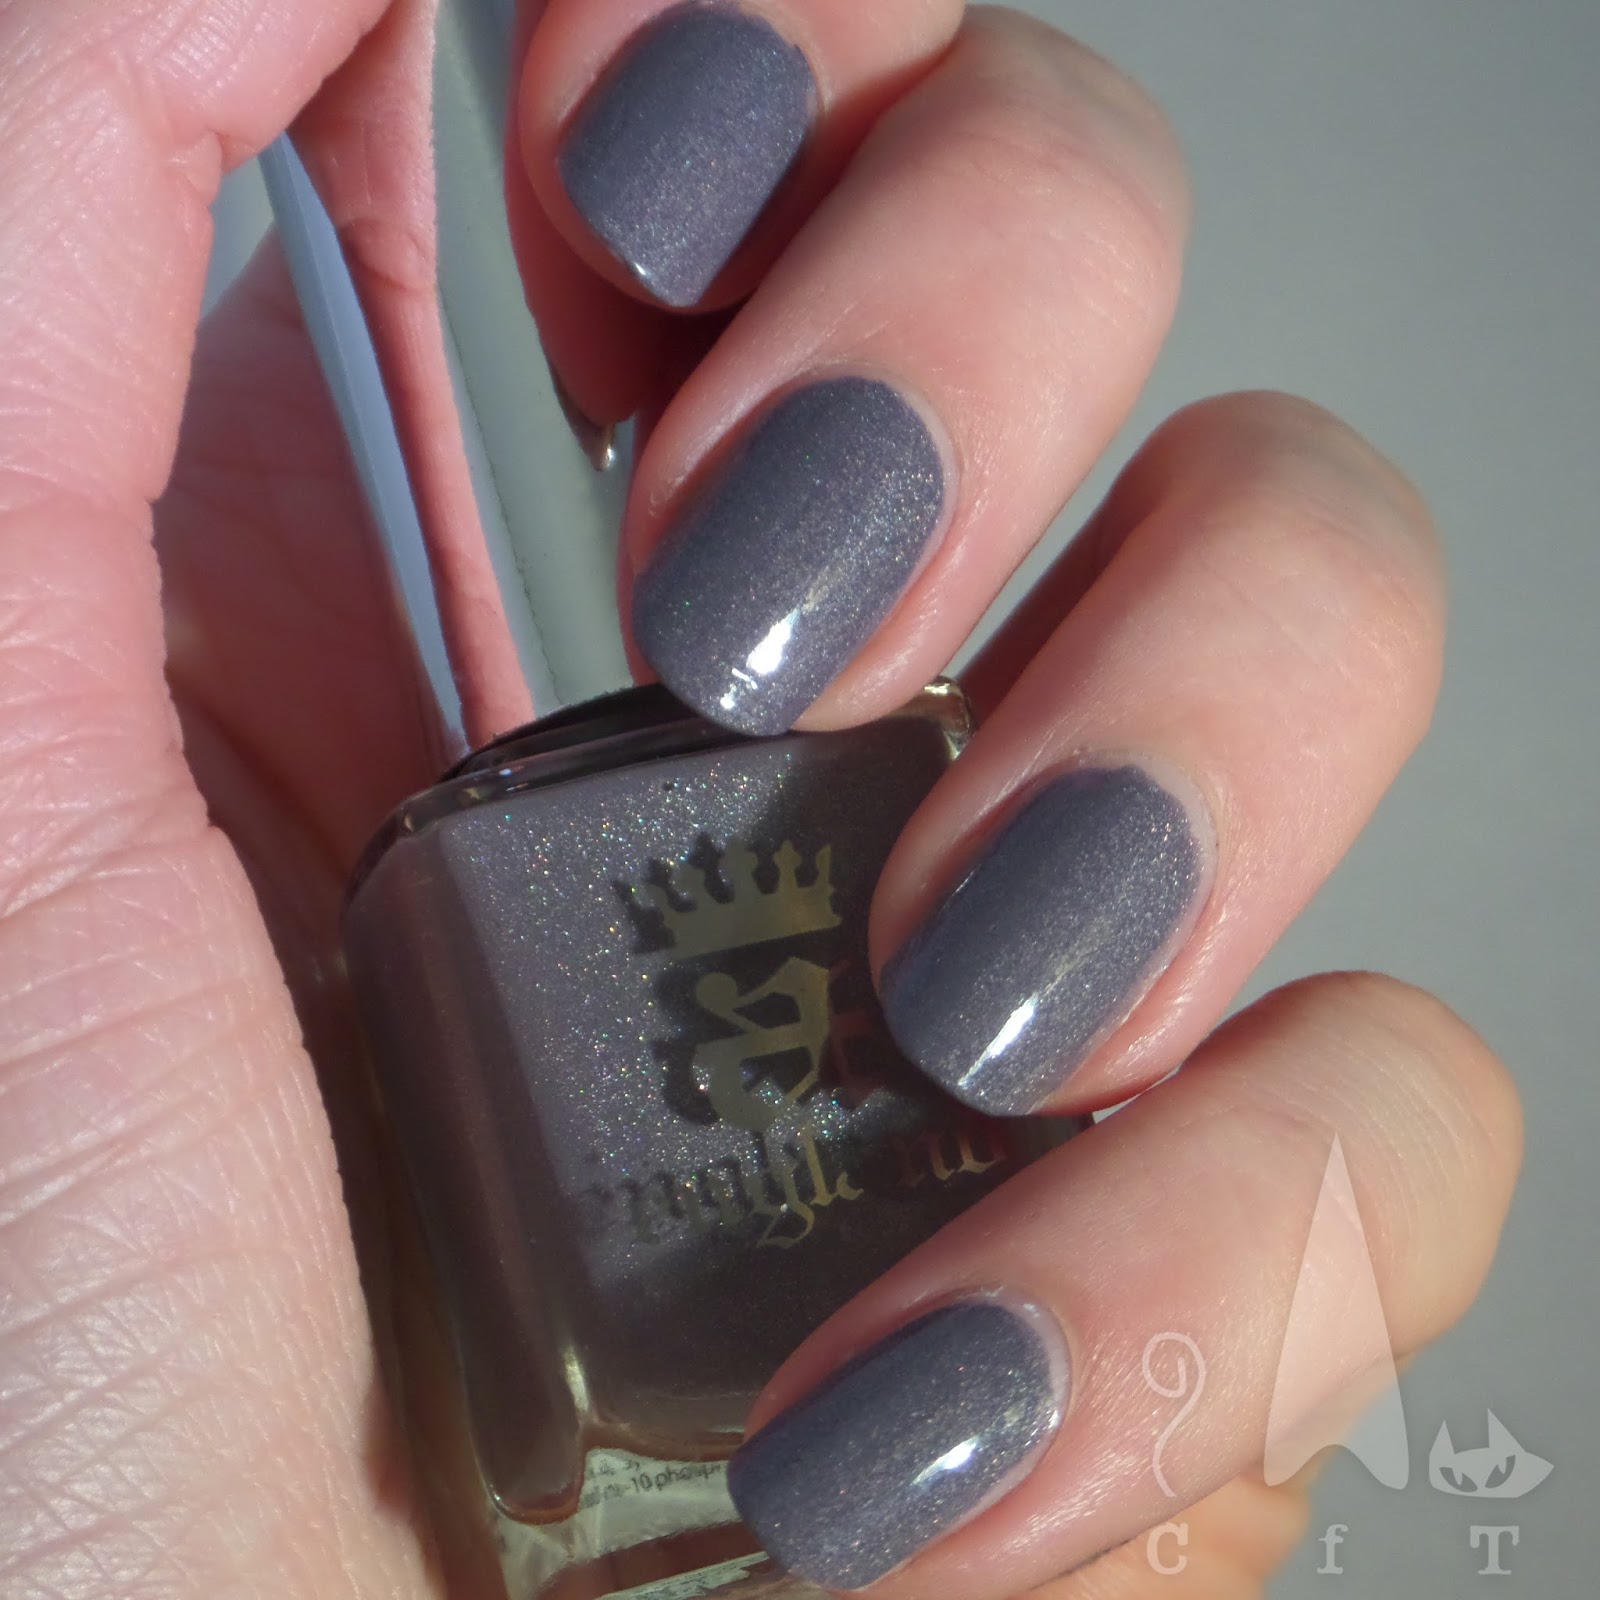
Left are the polishes in their lovely bottles. It's a classy bottle design and the glass is particularly shiny.


So on to the polish, first up is Wuthering Heights. I'm quite a fan of grey nail polish, and this one has a lovely twist of slightly holographic shimmer so had to give it a try. I'd describe it as a medium grey with lots of shine. the shimmer is subtle and catches the light nicely. Consistency is smooth and not too thick, two to three coats required.


Next up is Spirit Of The Moors, I knew this would be the favourite from the outset, and I was right! Bright cobalt type blues are my favourite colour so when I saw this shimmery one it was love at first sight! As with Wuthering Heights this one has a subtle holographic shimmer, it's slightly stronger in this one which might just be to do with the vibrancy of the colour. I don't know what more to say, a truly beautiful polish! It's like a more glam version of Barry M's denim effect.


So, did I like them? As you've probably gathered the answer is yes! I have already purchased three more (there was an offer, I couldn't help myself!), including one from the To Emily Bronte collection. I look forward to trying them and sharing the results.

Thursday, 11 February 2016

He's Her Lobster

It's valentines mani time! I wanted to do this design for actual valentines day, but am going to a wedding the day before so wanted something that would work with the dress I'm wearing. At least this gives me a chance to enter the So Nailicious edgy valentines nail art competition!

Like many I am absolutely obsessed with the TV programme Friends and find the idea of lobsters growing old together adorable! So this was an obvious design for me, particularly since getting a stamping plate with a little lobster image.


Nothing too complicated going on here, used dotting tools and a fine brush for the hearts (1st time I'd tried this as I don't usually do hearts, so they're a bit wobbly!), and stamping plates for the lobsters. The plate I used was from Mo You, Cookbook Collection 12, I'd rather not think of anyone cooking these adorable little creatures though!! I'm particularly fond of the thumb nails with the little lobsters holding claws, just too cute!

For the stamping and hearts I used Barry M's Sparkling Ruby, it stamps really well with a subtle shimmer. Looks a bit like two different polishes though as the hearts are so much thicker. Looking forward to seeing the other entries!


Colours Used: Coconut - Barry M, Sparkling Ruby - Barry M

Tuesday, 9 February 2016

OPI Colour Party (Color Paints 1st Try)

Good evening! It's been over a week since I've blogged so today I have a very colourful and picture heavy blog post. I've been wearing a lot of greys and blacks recently (with a bit of glitter of course) so it's been good to have some contrast. I was off work ill a couple of weeks ago and decided to treat myself to a little mini set of OPI Color Paints as I've seen so much of them on-line. I'm pleased to say they did not disappoint...


I'm usually not one for mini polishes, I'd rather have a full size bottle, but this set is perfect for trying out the colour paints and I wanted to get a good range of colours. They are absolutely adorable! They've not lost anything in the design and are just teeny tiny OPI's. To get some perspective on how diddy they are, here is them spilling out of my hand, and one next to a full sized OPI nail polish,

 
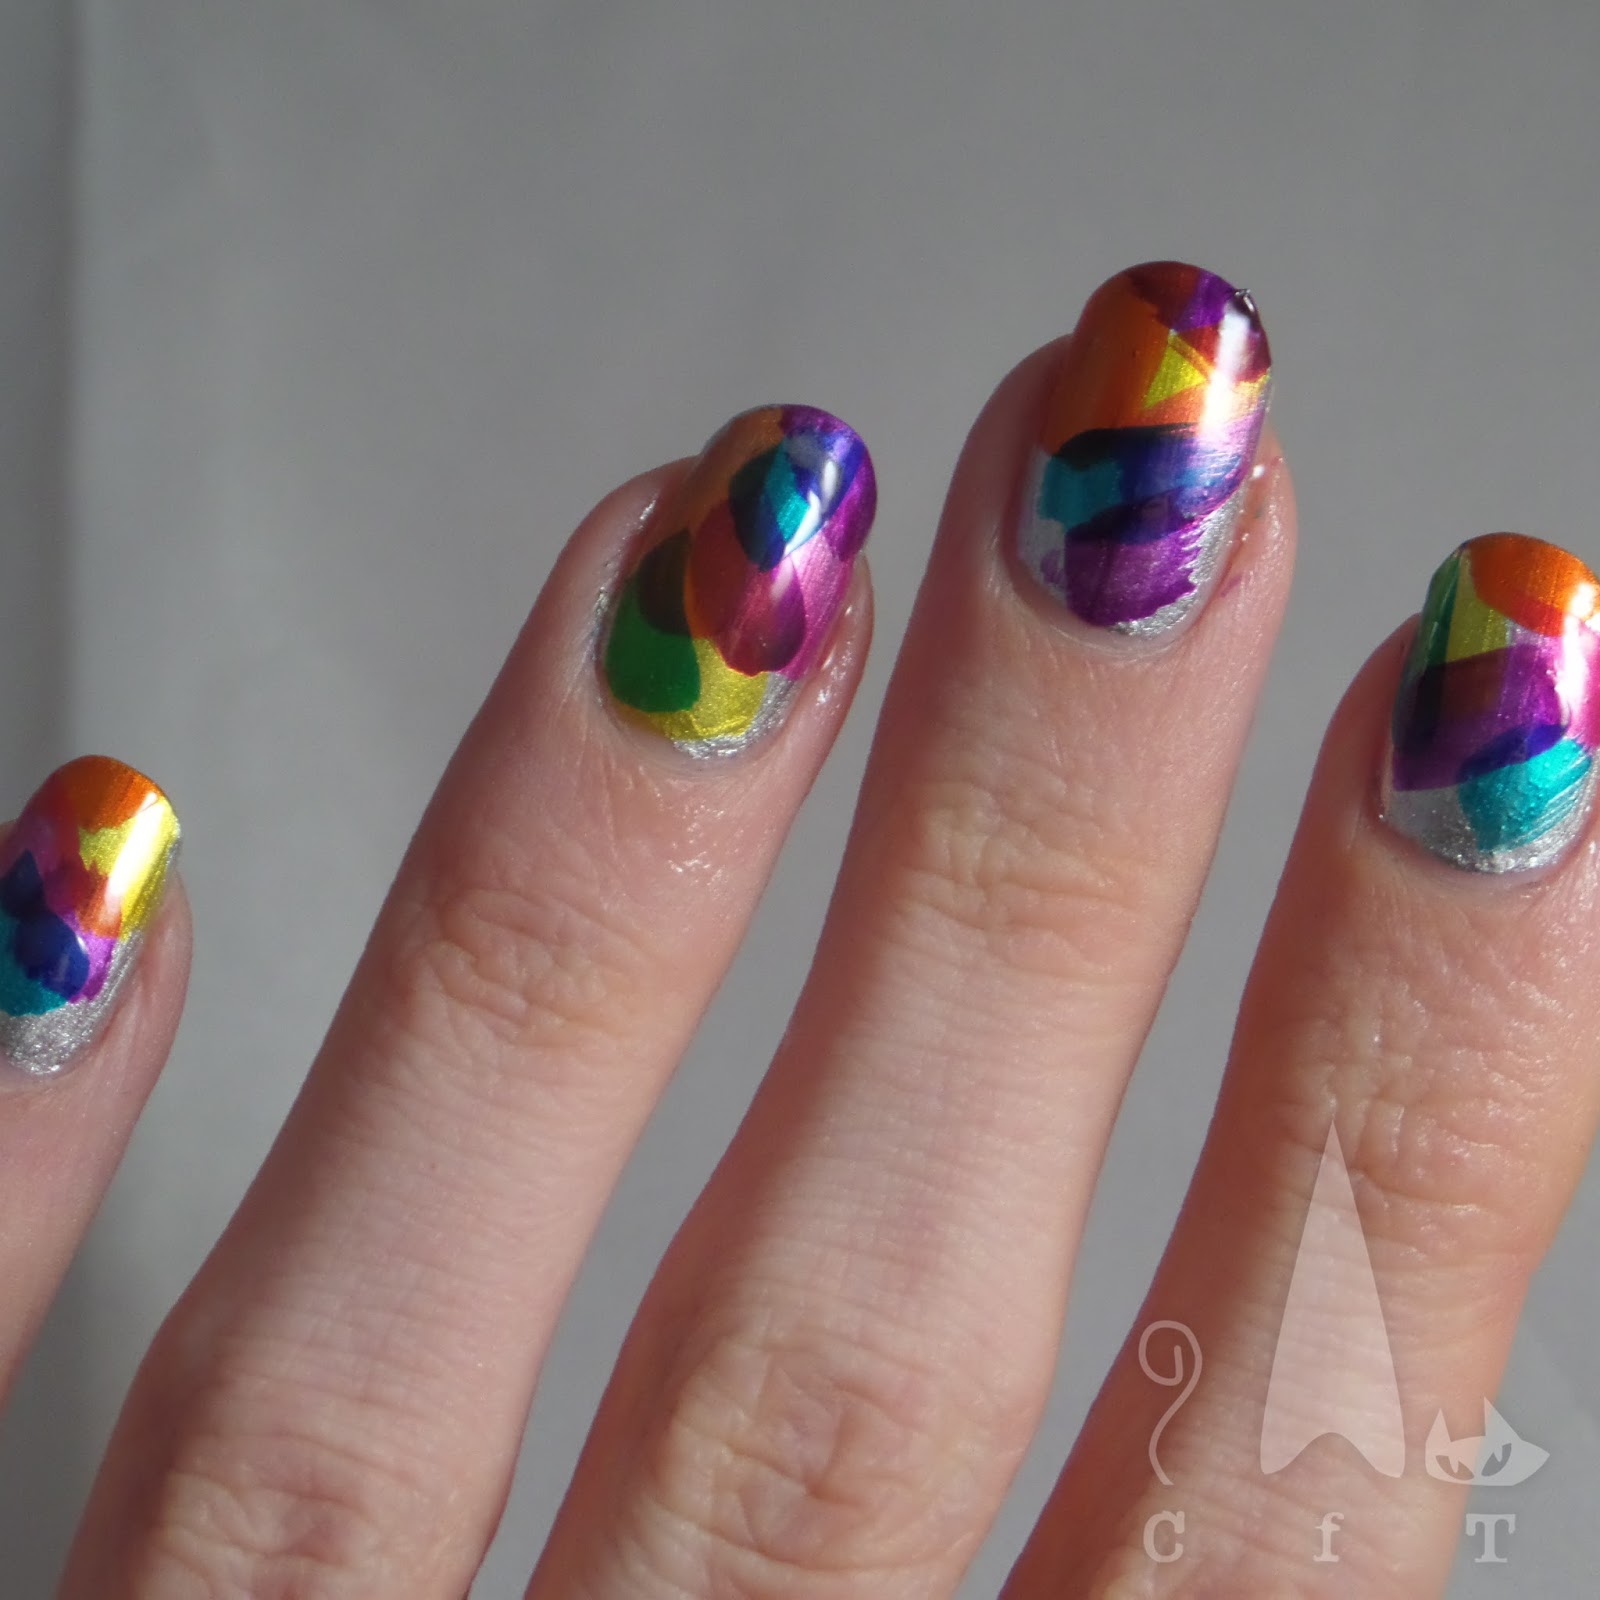
For my first attempt I had been planning on doing a colourful dotticure, but was drawn in my the images on the box and decided to go for something a little less orderly. The options are endless with the colour paints. I will still be trying a dotticure and love the idea of painting them over glitter, or using them in a stained glass or butterfly stamping design.

The silver canvas was a lovely base as it really made the colours pop. I've heard they go well over white too. It applied well and is a definite one coater but did take a little while to try. The top two pictures below are of my left hand and the bottom are my right. I've ended up with a slightly different effect on each one. My personal favourite is my left hand, I really like how the blue looks completely diferrent depending on what it covers ( a lovely green when overlapping the yellow).


So would I buy the full size bottles? Definitely! But not all of them as there are quite a few. I'll wait and see how quickly I use up these mini's first. The consistency of the colours is lovely and there are just so so many things you can do with them. I have a list already! I'm also impressed at the width of the brushes considering the bottles are so small. A definite winner!

Sunday, 31 January 2016

Stamping Sunday: Birds Of A Feather

Today's stamping Sunday design was actually done on Thursday evening, but I am still wearing it, so clearly a success! This was my first attempt at layered stamping and I'm pleased with the results. I started with Nails Inc's White Horse Street from the 'New White' collection. The two New White's I have are sooo beautiful and just lovely to paint with and wear. The type of polish where I just keep looking at my hands!

Next I used white stamping polish from Mo You to stamp feathers onto three nails on each hand, (the feathers are from Mo You Explorer Plate Collection 14) and black stamping polish for the feathers on the thumb, from the same stamping plate. I used one of Nails Inc's 'feathered' effect polishes to go around the thumb feathers and on my accent nail. I had a couple of feather polishes already but came across this sparkly gem in TK Maxx not too long ago.

 Finally I used my Mo You Gothic Plate Collection 10 plate for the birds (except on my little finger, those also came from the Explorer plate). I used my clear jelly stamper to carefully place the birds where I wanted them. This took quite a long time and it was getting late so unfortunately there is a little smudging where the top coat was applied.

Overall I really like this design and it's nice to have something a bit different to all the dark colours I've been wearing lately. Please excuse the quality of the fourth photo below, I wanted a nice picture of the feather polish as it's such a nice bottle but I think my photography requires some work!


Colours Used: White Horse Street - Nails Inc, White Knight - Mo You, Black Knight - Mo You, Henley - Nails Inc

Friday, 29 January 2016

HBP Presents: An Arctic 'Grey-dient'

So the time has come for another Hobby Polish Bloggers link up. The HBP Facebook group is a great place for sharing and learning tips and tricks on anything nail art/nail blog related. This months theme is gradients. I usually associate gradients more with spring/summer but have fancied trying a grey one for a while now so this was my chance. I used three grey shades (detailed at the bottom of this post) to create the gradient with some nail art sponges from Ebay, and then used a Mo You stamping plate (Enchanted Plate collection 05) for the design.

I had so many nail fails doing this! All went well to start with but I tried a peel of barrier for the first time, and on a couple of my nails where these touched the nail varnish, it peeled part of it off when I tried to remove it, you can see the effect of this on my thumbnail below. I also had a couple of Cellotape miss-haps (I was using it to clean my stamper) where it became stuck to and peeled off little bits of polish, so I had to try and patch them up. Mostly hidden by the stamping but it was obvious to me, so this mani didn't last long! I'm thinking these things happened because the polish wasn't quire dry enough so at least there is a lesson learnt.

Overall I like the gradient, the stamping images and the colours, but thing this may have worked slightly better with a wintery pattern (from the same plate) rather than the animals, as in some lights they weren't very clear. Also less nail fails would be good! I liked the super shinyness of the silver against the darker grey.


Colours Used: Little Bo Peep - Rimmel, Grey - Barry M, Dragster - Barry M, Dazzle - Orly

Check out all the other lovely designs below!


Sunday, 24 January 2016

Stamping Sunday: Leafy Green

Today I am showing you some last minute afternoon entertainment in the form of doing my sisters nails! She wanted something green to match the logo at the charity shop where she's currently volunteering so we decided to go with something leafy. We looked through my stamping plates and chose Mo You's Pro Collection Plate 06. The leafy pattern is in a subtle silver polish and the floral accent nail is in a metallic rose gold type shade from Nails Inc (details below pictures). I particularly like the accent nail, it was an unexpected hit paired with green.

Here is the design below. Two things to apologise for, firstly the incomplete clean up and secondly the poor picture quality. I still haven't mastered my light box (images come out really bright) so I tried just in normal evening light but it was hard to get a clear detailed image without blurring.

Overall I like the design and look forward to using more leafy patterns in the future, especially now I have my clear jelly stamper to play with too :).


Colours Used: Key Lime - Barry M, Soho Silver - Nails Inc, Kings Road - Nails Inc