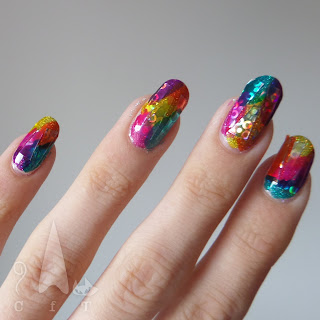
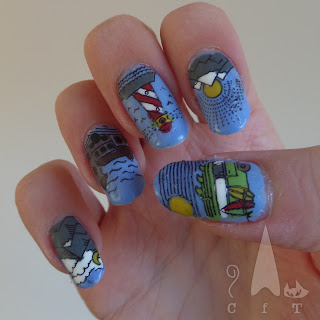
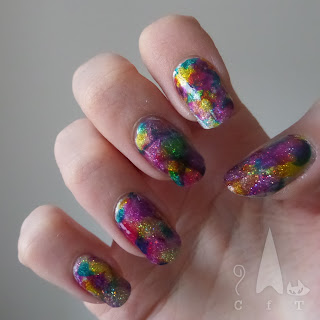
Hey space turtles! Keeping this one short and sweet today as I have a bit of a back log. I fancied trying out my china plate stamping plate again and after some thought as to what would work best I decided to go for bright and colourful as Spring approaches. I started with a base coat and two layers of white polish (best nail polish name ever - colours listed below the pictures) and then added the images in a variety of colours using my Porcelain 02 stamping plate from Mo You London. I finished the look with a glossy top coat. I'm thinking I should have tried them out in matte too but too late now as I moved onto my next nail art today! Pleased with how these came out :)
Monday, 3 April 2023
China Plate Skittle
Saturday, 4 March 2023
Arctic Portraits
Hey space turtles! Today's nail art was inspired by some notecards I saw in Paperchase. I can no longer find a picture of them and they don't look that similar but they sparked an idea. I started with a couple of layers of white nail polish with one of the best named nail polishes ever - A Mantis Shrimp's Favourite Colour. I then added images from Mo You London's Enchanted 05 stamping plate in black stamping polish. I used a large dotting tool to add spots around the edges in bold colours. I started with the blue and tweaked the technique a bit as I went along. I finished the look with a matte top coat.
I really love how this came out and am enjoying the matte look, it really makes the colours pop. Unfortunately I did have a nail disaster the morning after I did these! I'm so glad I took some pictures beforehand! When trying to wrestle a particularly tight bin bag off our bin I sadly broke a nail! It was above the nail line luckily but only just - so I lost part of the narwhal. It's been years since I broke a nail so a bit of a shock to the system! I've filed my nails down a bit but can see a crack in my thumb nail on the same hand so hoping I don't have a disaster there too!
Tuesday, 27 November 2018
Barry M Rainbow Fish Disco

|

|

|

|
Thursday, 6 September 2018
Bubble Smoosh! (Take One)
So this was my first attempt. Some nails have come out better than others which I guess is to be expected. I've tried to get the best ones in these pictures but please excuse the blurring! I used my Uber Mat and a clear stamper to make decals. For each nail I started with a base (varying the colour) then swiped some generous quantities of the other colours over the top. I then pressed the stamper lightly over the top to merge the colours together. I tried varying the pressure and speed of this but couldn't quite work out what worked best. It's easier to see once on the nails!
I've seen this effect described as fluid nail art, which makes sense but I think I will call mine a bubble smoosh! It's a little like the 'smoosh' nail art which people do directly on their nails, but with the addition of bubbles from the Spot It polishes.

|

|

|

|
Thursday, 21 December 2017
Gingerbread Mix Nail Art
I started with a shimmery pale grey base (colours listed below the pictures), and created decals on my Uber Mat. You can see how here. I was keen to try out these cute little gingerbread people from my Uberchic Christmas-01 stamping plate and selected a few other images to go with them. I used most of the Cirque Colors Facets Collection to fill the images and think they worked well, especially the gingerbread people. The collection is from last year and I absolutely love it, such perfect shimmer! The only thing I'd change about this nail art is that the presents came out a bit dark. Maybe next time I will use a different outlining colour.

|

|

|

|
Thanks for reading :)
Saturday, 9 December 2017
Christmas Wrapping Nails - Cheers To The Holidays
As usual I'm behind with my nail blogging, so I've already moved onto another design, but I'm enjoying revisiting this one already as I was quite pleased with it! I used Cheers To The Holidays from Fun Lacquer again for my main work Christmas party, as it's a lovely bright party colour without being sparkly, and my dress was already sparkly. After the party I didn't want to take it off so tried out my new Festive 06 stamping plate from Mo You London over the top.
On my index and little finger nails I used this lovely Christmas star pattern which reminds me of the decorative ribbons you put on presents. On my middle fingers I used gold and silver, though the gold isn't that visible at the edges, and for the ring finger and thumb nails I used the advance stamping technique (you can see how here). So I pretty much ended up practising a variety of stamping techniques. I struggled to take this nail art off as I do rather like it, but there are too many nail ideas and not enough time! I also like how my nail shape is looking at the moment - so all in all this was a winner!

|

|

|

|
Saturday, 21 October 2017
Hoot Hoot Hoot - Owl Nails
So when I was doing a friends nails, she was looking through my stamping plates and found one I forgot I had bought, the UberChic owl plate. I seem to associate owls with autumn (is that just me?) so thought now is the perfect time to try it out. I also had three new holo's from Painted Polish by Lexi (colours listed below the pictures) so thought I'd give them a try too. I've included an image of just the colours below, and at the bottom of this post will do a little mini review.
I painted alternate colours onto my nails, and then used the advances stamping technique with my Uber Mat for the owls, and just regular stamping with white stamping polish on my middle fingers. I really liked how these images came out. The owls are so cute (there are loads more on the plate too) and the images came out nice and crisp. I think the colours worked well too. You can see how to advanced stamp in pictures here.

|

|

|

|
Painted Polish - Jolly My Roger (copper-ish), Yo-Ho Holo (green) and Love & Liberty (blue)
Just wanted to share my thoughts in the three untried holo's I bought from Rainbow Connection about a month or so. How I managed to go that long without trying them I don't know! All three shades have a lovely consistency, and as you can see from the pictures, are pretty holographic! Love & Liberty is quite opaque, you could probably get away with one coat but I used two here as I could still see a\ bit of nail line in the light. For Jolly My Roger and Yo-Ho Holo two-three coats would be needed.
Monday, 7 August 2017
Disco Rainbow! (Inspired by So Hot Right Nail)
So I started with a peal off base coat, and then a layer of silver holographic glitter polish (the ones I used are listed below the pictures). I then added a thin layer of a different holo polish to add some dimension, and because it is an even sparklier one! Next I cut some shiny holographic nail foil (bought cheap on eBay) into thin triangular pieces. I added some clear polish to my nails and used tweezers to place three triangles on each nail.
Those of you who have tried a similar technique in the past will have noticed that I missed something! I was meant to remove the clear layer from the nail foils before placing them. I completely forgot this which meant a few of them flaked off over the next few days taking the colour with them. I will definitely being doing similar designs again so at least there is a lesson there!
Finally I used some OPI Color Paints and painted them over the top in just one layer so the holo goodness shined through. I loved the final effect so it's a shame it didn't last longer!

|

|

|

|
And finally, a picture of just the silver, as it was soo shiny, and a picture which didn't quite come out right, but I just had to share how it looked with my bright pink Comforter shower gel from Lush!

|

|
Sunday, 28 May 2017
Stamping Sunday - Holiday Nails
I used my Uber Mat and the advanced stamping technique to create this with a variety of colours (listed below the images). You can see a picture tutorial how I did it here. I love the Scandi plates and all the options with them, I'm looking forward to using them for some similar London themed designs at some point, but I have a long long list of things to try so it might be a while!
Hope you enjoy the rest of your weekend :)

|

|

|

|
Wednesday, 18 January 2017
Rainbow Oil Slick
This design was good fun and easy to do. I started with a silver base, and the added some glitter. I used two different silver glitters. Cosmic Girl from Danglefoot Polish gave a lovely twinkly and somewhat holographic look, and then I added some Diamond Glitter from Barry M for some larger glitter pieces and extra sparkle.
I googled Unicorn Oil Slick and came across a handy video from Nails by Jema. I enjoyed watching the video for tips. I knew how I was going to do the nails but wanted to check out my options! I decided to change my original plan of smooshing the colours onto my nails with a stamper, and followed Jema's advice of using my Uber Mat to create decals instead. This meant I could create more than I needed, and select only the best ones to use. I'm glad I did that as some of the ones on my mat weren't as good as I'd have liked. The ones on my nails were the most multi coloured, still ended up with one very pink little finger though!

|

|

|

|
Wednesday, 11 November 2015
Party Sprinkles
There's not an awful lot to say about how it was done. I used a beige base on the accent nails, and then used a dotting tool to apply the different colours. I particularly like the unusual range of colours, I would place this as a spring or summer design but think it can work for any time of year. Besides I couldn't wait till next spring to share! Over the top I've used Nails Inc's plumping gel effect top coat for some extra shine. It's a lovely shiny topcoat but I've since acquired their Kensington Caviar one which is even better as it's just as shiny and dried so fast!
Colours Used: Basil Street - Nails Inc, Tate - Nails Inc, Cyan - Barry M, Notting Hill Carnival - Nails Inc, Wardour Street - Nails Inc, Peach Melba - Barry M, Coconut - Barry M, Blue Moon - Barry M, Plum - Barry M


