Showing posts with label Danglefoot Polish. Show all posts

Tuesday, 24 December 2019

Christmas Countdown Nails!

Happy Christmas Eve! The nail art I'm sharing with you today is one I was excited to try after the idea came to mind when we picked up a little count down to Christmas decoration at an arcade in Hastings. The idea was to put numbers on my nails and cross them off as the days went by. In the end I didn't cross any off after 5 as I think they looked nicer with the numbers showing! I really enjoyed bringing an advent calendar feeling to my nails. Maybe next year I can somehow have pictures that I uncover as a countdown to Christmas?

I started with a base of Christmas Cookie by ILNP on all the nails where I wanted to put images, Say Love (also ILNP) on a couple more, and for the green base I used green polish topped with green glitter (colours listed below the pictures). For the images I used the advanced stamping technique with stamping plates Noel 03 from Mo You London and Happy Christmas from UberChic. For the background patterns beneath the numbers I used more images from the Happy Christmas plate and Holiday Spirit, also from UberChic. On the Happy Christmas plate there is a little circle for colouring in one of the bauble images which was a perfect base for the numbers. The numbers are from Mo You London's Typography 04 plate.

I'm really happy with how these turned out, I love the little mouse with a hot cocoa image! I've enjoyed having these very festive colours on too! I felt a little sad to be taking them off today but by Christmas Day nail art must be done!
Colours used: Christmas Cookie - ILNP, Say Love - ILNP, Watermelon - Barry M, Secret - Fun Lacquer, Primadonna - Danglefoot, Black Stamping Polish - Rainbow Connection, White Stamping Polish - Rainbow Connection, Little Bo Peep - Rimmel, Foil Effects in Gold - Barry M

Saturday, 17 November 2018

Little Bit of London On My Nails

So this blog post will probably always annoy me as there are two rather blurry pictures, but I would otherwise have been left with only two pictures and somehow this was the lesser of two evils! Need to be more careful when I'm taking them I guess!

I've been meaning to do some London themed nail art with my Mo You London Scandi plates for a while, and it turns out I have the perfect sparkly Big Ben shade, which I guess could mean I have too much nail polish... (shock, horror!). I decided early on I wanted some sparkle in this, I think it's the time of year now where I will always be a little bit sparkly!

I used the Scandi 01 plate from Mo You London for the bus and phone box image, and the Scandi 03 plate for the Big Ben image. I was going to go all our with the London Eye etc but am glad I kept it simple as I think it goes well with the black. I used the advanced stamping technique to colour in the images, you can see how here. I didn't do too well with the red, I think it was because I was sleepy but they did look a little messy! Big Ben came out a lot better. Just re-doing my nails with something mermaidy - but looking forward to the imminent start of Christmas nails!
Colours used: Higitus Figitus - Danglefoot Polish, Cream Soda - Barry M, Midnight Mischief - Painted Polish, Madder - Cirque Colors, Taupe Temptation - Painted Polish, Wuthering Heights - A England 

Wednesday, 18 January 2017

Rainbow Oil Slick

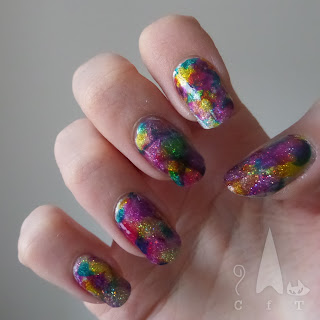
Hello nail people! Today I'm recreating a look I've seen around on Instagram a fair bit and couldn't resist trying. The first version I saw was a 'unicorn oil slick' and had more pastely colours. I used my OPI Color Paints for a brighter look. The finished product was less unicorn like so it is a rainbow oil slick!

This design was good fun and easy to do. I started with a silver base, and the added some glitter. I used two different silver glitters. Cosmic Girl from Danglefoot Polish gave a lovely twinkly and somewhat holographic look, and then I added some Diamond Glitter from Barry M for some larger glitter pieces and extra sparkle.

I googled Unicorn Oil Slick and came across a handy video from Nails by Jema. I enjoyed watching the video for tips. I knew how I was going to do the nails but wanted to check out my options! I decided to change my original plan of smooshing the colours onto my nails with a stamper, and followed Jema's advice of using my Uber Mat to create decals instead. This meant I could create more than I needed, and select only the best ones to use. I'm glad I did that as some of the ones on my mat weren't as good as I'd have liked. The ones on my nails were the most multi coloured, still ended up with one very pink little finger though!
Colours used: Silver Canvas Undercoat - OPI, Cosmic Girl - Danglefoot Polish, Diamond Glitter - Barry M, Primarily Yellow - OPI, Pen & Pink - OPI, Purple Perspective - OPI, Turquoise Asthetic

Tuesday, 28 June 2016

HPB Presents: Glitter Jelly Strawberries

Today I am taking part in another Hobby Polish Bloggers link up, this month the theme is fruit. I think it's a great theme, seasonal and plenty of options, and am glad to be taking part again. I haven't had a proper look yet but I've had a brief glance and I have to say there are some gorgeous designs! Mine didn't go quite to plan, so I'm putting it up before I scare myself by looking at everyone elses!

I spent a lot of time deciding what to do for this theme, I was very tempted to do pineapples again, but then it occurred to me that I could use this to do glitter-jelly-sandwich nails for the first time, so I went with strawberries.

I started with a base of Cosmic Girl from Danglefoot polish, I've included a picture below though I found it hard to capture all the lovely sparkles, hence the weird lighting! Next I painted on a layer of Pen & Pink from OPI's color paints collection. It was very bright at this stage! I painted on the strawberry seeds with white, and then thought they looked too bright so out another layer of pink over the top. I do quite like the subtle effect this left. It's just about a pond mani! Finally I painted on the leaves in white, and then dabbed on some green for a mottled leafy effect.

As you can see from the pictures, the glitter didn't show through, which is a shame as I would have liked sparkly strawberries! I think the textured effect did give it something though. You can see my more successful attempts at fruit nails here: Lemons or Five a day, I've also done a few pineapple designs in the past. Please be sure to check out the other mani's for this theme (links below the pictures), there are some really stunning designs!
Colours used: Cosmic Girl - Danglefoot Polish, Pen & Pink - OPI, Alpine Snow - OPI, Turquoise Aesthetic - OPI


Monday, 30 May 2016

Origami Sea Creatures: Inspired By Paperchase

Hello everyone! This was meant to be a stamping Sunday post, but I got a little carried away yesterday and ran out of time. Feels like a Sunday to me still as we have a bank holiday today in the UK, so I've sort of lost track of the days a little! As usual it is going too fast though!

The manicure I'm showing you today was inspired by a lovely passport cover I saw online, and just had to get when shopping yesterday. Glitter and sea creatures are two great loves of mine, so I couldn't resist! I didn't quite stick to the colour scheme as you can see. I went for Eye Candy by Danglefoot Polish as I hadn't yet tried it. It is wonderfully sparkly!
Fortunately I happen to have an origami sea creature stamping plate from Mo You London (Origami Plate Collection 05) as I'm not sure how I would have attempted this otherwise! The plate has sea creatures, dinosaurs and mythical creatures on, it's basically perfect, all it needs is some cats! I used my Uber Mat to make decals to place on my nail. I used dotting tools to colour in the images which was nice and easy as I was only using one colour for each image. Before placing the images I used Foxy Paws Smooth Operator to give me a nice level surface. After trimming around the images and sticking them down I finished off with my glossy Nails Inc Kensington Caviar top coat to give it some serious shine!
Colours used: Eye Candy - Danglefoot Polish, Smooth Operator - Foxy Paws, Grey - Barry M, St James - Nails Inc, Coconut - Barry M, Seven Dials - Nails Inc, Key Lime - Barry M, Wardour Street - Nails Inc, Papaya - Barry M, Spring Greeg - Barry M, Seymour Walk - Nails Inc, Guava - Barry M

Sunday, 13 March 2016

Stamping Sunday: Fans Of Indie

Todays stamping Sunday nail art is actually from a  few weeks ago, and already holds fond memories of my business trip to Madrid (it was my first business trip abroad, I'm sure they won't always be fond :P). Because of being away and moving around the same time this one did have to last a little while, and I'm pleased to say it did.

The base colour/glitter is Scream Queen from Danglefoot Polish (swatches at the bottom of this blog post). I ordered this just after new year and it was the first chance I got to use it. I was a little worried it would turn out to be quite pink when I saw it in the bottle, but it's is a beautiful bright purply shade with pink shimmer :).

I was a little sad to cover this with such a strong pattern, but got over it pretty quick as I like the way it turned out :) Looks like quirky sparkly wall paper! I used the decorative fan/plant pattern on my Mo You stamper and plate number 06 from their Pro Collection with a Barry M foil effect polish. The glitter polish dried a little textured so I used a top coat before and after stamping to smooth it over.

Colours used: Scream Queen - Danglefoot Polish, Gold Foil Effect - Barry M

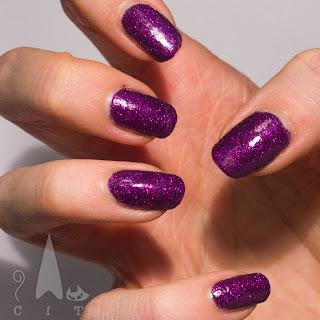
And here is Scream Queen in all it's glory! So beautiful and bright :) It's quite a thick glitter (because there is so much sparklyness packed in!) so is full cover, only base coat underneath.

Saturday, 23 January 2016

Geek Out! Le Geek C'est Chic!

This weekend I'm feeling poorly, but just about awake enough to comfort myself with a bit of nail art, and a new nail polish to try! I'm having a real black nail polish moment. Wearing/ buying all kinds of variations with subtle shimmers, or really dark almost black shades. Perfect for this time of year really! From my recent post christmas haul this is my first wear of Higitus Figitus from Danglefoot Polish and I must say it's rather lovely (swatches at the bottom). A shimmer black in normal light, and a shimmery holo under bright light.

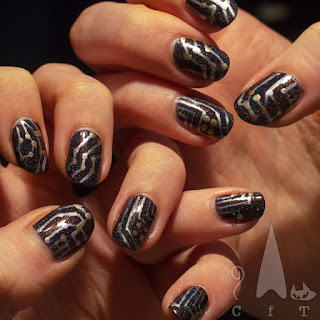
I've wanted to try this circuit board style nail art for a while. I have a lovely pair of Converse in this pattern which I'm super fond of and have had since I was about fifteen (ten years ago now, eek!). I used a silver nail art pen for the lines as I new they would be thin, though wonder if it may have been just as easy with a fine brush, as it can be hard to get the polish to come out properly at times. I then used a dotting tool for the gold dots using Uptown Glamour from Nails Inc's Kate spade collection of a few years ago. Finished off with my favourite topcoat, Kensington Caviar by Nails Inc, a particularly important step with nail art pens as I find they rub off a bit otherwise, plus, it dries super fast!


Below is the base colour in all it's glory! Brighter light on the left and normal light on the right. A really stylish nail polish I think and perfect for this type of design.

Colours Used: Higitus Figitus - Danglefoot Polish, Nail Art Pen in Silver - Barry M, Uptown Glamour - Nails Inc

Sunday, 20 December 2015

It's beginning to look a lot like Christmas...

OK so it began to look a lot like Christmas a while ago, but I like this as a name for this design! I don't usually use glittery polish for a base colour but I think this one is perfect for Christmas designs. I used a fine brush to paint on the trees and presents freehand. For the trees I used a very dark green underneath and then a metallic green over the top to give it a more 3 dimensional effect. I also used brush strokes to try and make it look a bit like branches, but it doesn't really show. I think to get that effect I'd probably have needed more contrasting colours.

I'm pleased with how they turned out, I think they look very classically Christmassy, and the gold gives them that extra something. I also likes how bright the presents were with the gold shining through a little from underneath. I toyed with the idea of putting some decorations on the tree but quite liked it how it was, keeping it simple.


< Here's a shot of the thumbs up close, I can never quite capture them quite as well in pictures of the whole hand. as you can probably tell from this i am right handed, hence the much neater tree on my left hand!


Colours Used: Primadonna - Danglefoot Polish, Stylenomics - Essie, Emerald Green - Barry M, Cocoa - Barry M, Red Hot Rio - OPI

Friday, 11 December 2015

Monthly Indie Review: Danglefoot Polish

I've moved this months indie review forward (usually around the 20th of the month) because I thought it might be helpful to those of you who are still Christmas shopping/ wish list creating. This months indie polish to try was Danglefoot polish (UK seller), which I discovered on Instagram. I was won over by a beautiful picture of gold polish being poured into the bottle and looking like liquid treasure! I ordered these on etsy for £6.50 each, and they arrived so fast and so sparkly I can only assume they were delivered by unicorn!

First up is the liquid treasure, Primadonna. This a lovely bright and shiny yellow gold. As you can see I got a little over excited with trying to apply the second coat too quickly and did smudge it a little. The polish is glitter heavy but the glitter is well combined with the base which gives it a nice smooth finish. It's absolutely spot on for the party season and will feature in one of my Christmas designs shortly! Below is two coats.


Next up is Grape Expectations (such a good name!), which is just SO SPARKLY!! I think this is in a clear base but you really get your moneys worth in glitter! Below is two coats but even one coat packs some serious sparkle. I won't lie, this is pinker than I expected, I thought it would be more purple. I'm keen to try it over a dark purple and see how that looks. If you're a really girly girl (or are looking for a Christmas present for a really girly girl) I would highly recommend this! I enjoyed the way this was always catching the light (even in the office) and got lots of compliments and 'wow's'.


So in conclusion I am definitely sold on these. Danglefoots speciality seems to be glitter which is awesome! Even down to the bottle design these are lovely, and really different, what Indie polish is about I think. I've also spotted an equally sparkly purple (Scream Queen) which I'm keen to try in January when my pre-Christmas embargo is up.