Showing posts with label Throwback Thursday. Show all posts

Thursday, 20 July 2017

Throwback Thursday: Pineapple Addict

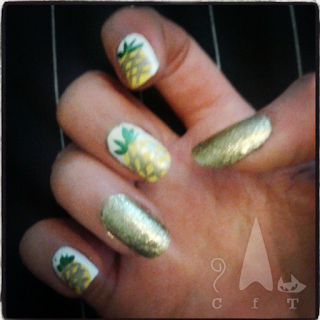
Hi everyone! The pineapples are back! I've done a few pineapple themed nail art designs before, so when Julys Nail Addicts collaboration theme was announced as time machine (throwback), I thought I'd recreate the first pineapple nails I ever did. I reckon they're from about 3 or 4 years ago. The older design is shown in the poor quality Instagram shot bottom right.

Rather ridiculously I did manage to do the pineapples the wrong way round! I usually paint so the designs are the right way up for me, but the original design was the other way round. I forgot this however when it came to re-doing it. I used a small nail art brush for the pineapples, and though I went for the same colours I refreshed it with newer nail polishes. I finished with my favourite top coat (Nails Inc Kensington Caviar), and it lasted just over a week, as I haven't had as much time to do my nails lately!

I think it's a slight improvement, neater round the edges anyway! You can see everyone else's throwback nail art on Instagram @nailaddictscollab
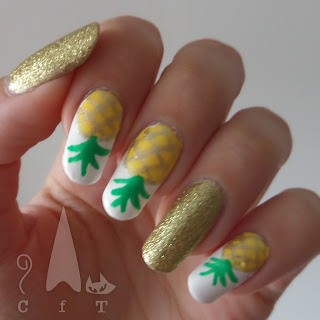
Colours used (new design): Alpine Snow - OPI, Gold Digger - Barry M, Seven Dials - Nails Inc, Spring Green - Barry M, Chelsea Embankment - Nails Inc

Thursday, 2 March 2017

Throwback Thursday: The One with Bird World

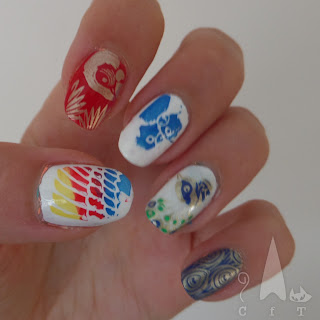
Today I'm bringing some more bright colour back to my blog and sharing some pictures that have been sat in my nail archive for aages. They just didn't quite fit in before it got colder and I got onto autumn shades. My inspiration for this design was a trip to Bird World on the Easter weekend 2016, so nearly a year ago! We saw some brilliant things, our favourites being some little chicks, an enormous peacock and the very vocal southern great horn-bill.

I used my Tropical 06 stamping plate from Mo You London for the images, as I am just not that good at freehand, and went for a mix of colours (listed below images). I used a picture of stamping techniques from standard stamping and gradient stamping (the parrot wing) to advanced stamping using my Uber Mat for the coloured in images. You can see instructions on advanced stamping here.

I think I will try this design again some time and try and make it a bit neater, but I did like the final look, it's so cheerful!
Colours used: Alpine Snow - OPI, White Knight - Mo You London, Gold Foil Effect - Barry M, Cobalt - Barry M, Key Lime - Barry M, Dead Heat - Barry M, Seven Dials - Nails Inc, Sloane Avenue - Nails Inc

Thursday, 25 August 2016

Throwback Thursday: When I had Talons!

Hello nail team! Tonight I'm just doing a quick post as I am overheating somewhat! This will probably sound crazy to many of you, but here in the UK we are not used to heatwaves, and right now it feels tropical! I've enjoyed it for a few days, but it's getting closer and closer and I'm starting to feel a little suffocated! Hopefully it means an epic thunder storm is coming!

So more importantly, onto the nails. I found this picture in my archive, and I reckon it's from about four years ago, back when I'd only recently started venturing into nail art. I used to let my nails get a lot longer then, whereas I prefer them a little shorter now (but still a bit long I admit!). Below is them long talon like in an unnamed teal polish from Accessorise and a gold crescent. I can't remember which the gold polish was, I have too many and it was too long ago!


Clearly I was not as good at clean up four years ago! (oops!) Thank you for reading my ramblings! Next blog post will be fuller.

Thursday, 23 June 2016

Throwback Thursday: Cobalt Concrete

Hi everyone! Just back from voting in the EU referendum :O Now onto some nails! These are from sooo long ago, possibly nearly three years. I still remember wearing them and enjoying the vibrant colours. I wore them for a trip to visit friends in Portsmouth, and think that it contrasted nicely with the teal maxi skirt I wore - visible in the images below.

I was late on the bandwagon with concrete polish, and got this one alongside a beige (or concrete coloured!) one in a Nails Inc sale. Cobalt blue is probably my favourite colour so I had to try it in this unusual texture. I find the matte-ness of it really brings out the colour, and the colour pops against my ghostly hands! I painted Stonehenge across all my nails, and then used glitter just on the middle two. I can't say I've ever used that glitter since, but it went well with the blue anyway! Will have to see where I can fit it in next.
Colours used: Stonehenge - Nails Inc, Pembridge Gardens - Nails Inc

Thursday, 26 May 2016

Throwback Thursday: Summer Colours ft Concrete Blue

Happy Thursday everyone! Sooo glad it's Friday tomorrow. Just a quick one today, with some bright colours to match the nice bright day we had today. Spent my lunch break reading in the park and befriended a very adorable caterpillar <3 hope this whether stays!

This one is from around two years ago, and I wore it on a day trip to Portsmouth. I am ashamed to say I haven't work either polish since! The blue is one of Nails Inc's concrete polishes, I was way behind on the concrete trend, didn't really pick it up till they were in the sales, but I couldn't miss this one as it is my favourite shade. Also picked up a concrete coloured one, but still haven't found a good way to work it into some nail art!

I found the matte/textured effect really brought out the vibrant blue. On my middle and ring fingers I used a glitter I got from a set of Nails Inc polishes over the top of the blue, I think it worked well as a summery look :)

Colours used: Stonehenge - Nails Inc, Pembridge Gardens - Nails Inc

Thursday, 5 May 2016

Throwback Thursday: Retro Tones

Happy Thursday everyone! I'm so glad it's Friday tomorrow! Today I have a design to show you from somewhere between two and three years ago, so please excuse all the clutter in the background. I was sat on my sisters bedroom windowsill with a bit of a hangover when I did these! Fond memories!

This colour combination is quite different that the sort of thing I normally go for, or ever have gone for, but I quite like it. I started with a neutral base. and then  used striping tape to create the triangle shapes. I finished off using a dotting tool to put a little black dot on the tip of each triangle. I think they look a little like party hats!

Colours used: Basil Street - Nails Inc, Antique Coral - Natural Collection, New York Noir - Nails Inc

Thursday, 24 March 2016

Throwback Thursday: Easy Easter Pattern

Hello nail people! Tonight I'm showing another older nail design, hence the not so good pictures. This one is from not last Easter but the one before, so it's been waiting a while...

For this design I used nail; tape to get the three main colours neatly in place. Once dry I used a nail art pen to carefully draw on the pattern, going for a sort of painted Easter egg pattern. Finally, I used a dotting tool for the finishing touches on the pattern. All colours used are from Barry M, and I still have them!

I liked how this turned out considering how little effort was involved. I think the black perhaps takes away from the Easteryness a little, but it does make a striking pattern. \Not much else to say on this one, makes me a little nostalgic!

Colours used: Mint Green - Barry M, Berry Ice-cream - Barry M,Silver Foil Effect - Barry M, Nail Art Pen in Black - Barry M, Matt White - Barry M

Thursday, 3 March 2016

Throwback Thursday: Harry Potter

Todays throwback is one I'd completely forgotten about until someone sent me a link to a whole selection of Harry Potter nails. I sadly can't find the article any more but will add it in the comments if I find it. I did these for our trip to the Harry Potter studio tour, it was soo much fun!

Didn't go for anything particularly original with the design, the main part was inspired by a number of designs on Google images, and the thumb nail from some more! Apologies for the mess on these, as you can see one was taken pre-clean up!

To get the checked effect, based on the colours of the different houses at Hogwarts, I used nail art tape, and for the deathly hallows symbol I used a nail art pen. Had a bit of trouble with it coming out too thick. I think in future I'd just do it freehand as it's a fairly simple shape. That's all there is to it really. can't believe how long ago it was! (summer 2014)

Colours Used: New York Noir - Nails Inc, Matt White - Barry M, Gold Foil Effect - Barry M, Silver Foil Effect - Barry M, Yellow - Barry M. Block Your Green - Rimmel, Cobalt - Barry M, Red - Unknown. Nail Art Pen in Silver - Barry M

Thursday, 24 December 2015

Throwback Thursday: Christmas Pud's

I've technically just missed the opportunity to do this throwback Thursday... but I don't think it counts as being the next day till I've been to sleep and woken up! I hope everyone's had a fab Christmas eve. This was my first one off in a while and I've filled the day with nice things. Feeling very happy and snug, and very ready for Christmas!

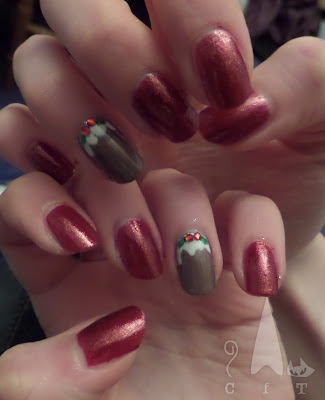
So below is a picture of last years Christmas day design. I was and still am pleased with this one. The red is a lovely Butter London which my boyfriend managed to get me at his old job. It is a Christmassy read with fine gold glitter, but sadly this doesn't really show up in the picture. For the puddings I used two different polishes as at the time I didn't have the right colour. I outlines the cream on top with a nail art pen and then filled in with a small brush. The gems were from Ebay and stuck on with clear polish, and the leaves freehand.

I've got my Christmas day nails done for this year now, will post them tomorrow or boxing day. I hope you all have a magical Christmas! xx


Colours Used: Bric-A-Brack - Butter London, Cappucino - Barry M, Shimmery brown polish - Unknown, Coconut - Barry M, Nail Art Pen in White - Barry M Emerald Green - Barry M

Thursday, 17 December 2015

Throwback Thursday: Reindeer Parade

Today I'm showing you my 2013 Christmas Day nails. I usually try and save the best Christmas design for Christmas itself, but I still don't know what I'm doing this year yet! I will show you 2014's ones on Christmas eve, though I think this might actually be better...

I started with a red base colour, and then went over it with one of Barry M's original glitters (smells pretty potent now, I don't know what they put in there! :0). The deer outline was done just with the polish brush (a and a smaller brush for the ears), dotting tools for the eyes, and a smaller brush for the antlers and nose. Pleased with how it turned out, and that I still like it two years later! Perhaps this is one to revisit this year...


Colours Used: 500 L'Oreal, Red Glitter - Barry M, Cappucino - Barry M, Matt White - Barry M, New York Noir - Nails Inc

Thursday, 10 December 2015

Throwback Thursday: Trees and Dots

Today's' throwback is obviously from a shorter nail moment for me! I've just given them a trim this evening as they were getting very talon like again. This month I think there will be a great variety of nails lengths in my posts!

I think this design is quite modern, I took inspiration from Pinterest, and wanted to use a new sparkly green I'd got. They make me think of wrapping paper. They are possibly not quite as christmassy as I'd intended but I like the final effect. My favourite nail is of course the accent nail with the little tree and star. This was stuck on with regular nail polish as I find it's surprisingly adhesive!


Colours Used: Coconut - Barry M, Emerald City - Models Own, Uptown Glamour by Kate Spade - Nails Inc, 500 - L'Oreal

Thursday, 3 December 2015

Throwback Thursday: Subtle Christmas Tree

Hello! I have had a terrible day at work so it's so nice to be sat here peacefully blogging! The bad days are almost worth it for the wonderful feeling of going home! Tonight is my first properly Christmas post, though I admit it's pretty subtle. I think it's a good one for work as it's not too out there.

Not sure how easy it is to tell because it's an old picture but the base colour is actually a super dark green. The modern Christmas tree outline was done with a dotting tool. I also used some thin nail tape to make sure the edges were neatly triangular. On top is a little decorative star which I got in a pack from eBay. I stick these on to my nails with a bit of clear polish, as I find it's actually surprisingly adhesive. Also much easier to remove that way! TTFN!


Colours used: Stylenomics - Essie, Gold - Limited Collection at M&S, Gold Star - eBay

Thursday, 29 October 2015

Throwback Thursday: It's Pumpkin Time

This time last year I sported a pumpkin face design for halloween. Was going through a bit of a shorter nails phase as you can see below. This was a very simply design to do, I used a dotting tool for the spots, and a nail art pen for the pumpkin faces. I know that there are some pretty good pumpkin face decals around at the moment but think they are one of the easier halloween designs to do. Would definitely consider trying this one again next year (I think I've just about run out of time this time round!).


Colours Used: W18 - Color Cosmetic, New York Noir - Kate Spade at Nails Inc, Matt White - Barry M, Nail Art Pen in Black - Barry M

Thursday, 15 October 2015

Throwback Thursday: Gold Leaf Flakes

This is one of my oldest throwback pictures, so apologies for the picture quality. Feels so long ago now! Must be getting on for about three years. I had read online somewhere about using sheets of gold leaf from a craft shop to use for nail art so decided to give it ago. It's suprisingly easy to do though can be a little fiddly.

The gold leaf can be broken into small peices using tweezers or your finders. Because it is so thin it mould and sticks to the nail really well even if the polish isn't still wet. A top coat is of course needed  to keep them in place and seal it in. I have pretty much got a lifestime supply of this stuff now so will have to try it again in the future!


Colours used: 161 - Barry M, Gold Leaf - Local Art Shop

Thursday, 8 October 2015

Throwback Thursday: The one with the pom-poms!

Got something a bit silly to showcase tonight. After watching the last episode of Doctor Foster in iPlayer I think I need something a bit lighthearted! So, I got this Nail Rock pom-pom set on sale a little while ago in Topshop. I've got a couple of their other sets, the caviar and velvet but none as ridiculous as this! I like!

The set comes with a lovely green nail polish, which I think I'd be pretty tempted to wear on it's own. It's a nice consistency and lovely and shiny. Instructions are fairly simple, apply one coat, let it dry, apply another coat, press on pom-poms and allow to dry. Here are the results below:


In conclusion these were great fun and suprisingly long lasting! I wore them for a night out and the next morning I had only lost one. They lasted most of the next day but were starting to gather dust and look kind of grey, so I think these are a one day/night look. I actually had to cut the pom-poms off in the end but they were fairly easy to remove once it was just little fuzzy stubbs left. What do you think, super silly or super awesome?!

Thursday, 1 October 2015

Throwback Thursday: Pastel Patterns

Todays throwback is a little rough round the edges, it was my first attempt at outlining my nails round the edges, and all the lines were done with a Barry M nail art pen. Inspiration from Pinterest but as with many of my throwback Thursdays I'm not sure where this would have been from so if you know please let me know so I can credit.

Finally have a watermark! :) Thank you to my lovely boyfriend for help with this. Thinking of adding it to all my older blog posts but I think it would take a while!


Colours Used: Mint Green - Barry M, Berry Ice Cream - Barry M, Colville Mews - Nails Inc, Nail Art Pen in Black - Barry M

Thursday, 10 September 2015

Throwback Thursday: Triangles Are My Favourite Shape

Good evening! This one is from just over a year ago, apologies for the picture quality! I took inspration from Pinterest and painted the small shapes with a nail art brush. The edges were then outlined with a black nail art pen. I find this ais a really good way to neaten up the edges if you're not so steady with a nail art brush! I definitely need some practise!

Not sure whether I prefer these before or after the matte top coat. If the picture was less blurry I think matte would just about win!

Colours Used: Colville Mews - Nails Inc, Cyan Blue - Barry M, Holland Park - Nails Inc, Nail Art Pen in Black - Barry M, Pro Matte Finish - Rimmel

Thursday, 13 August 2015

Throwback Thursday: Tribal Print

Todays throwback picture is of a tribal print I tried some time ago. I've seen this sort of design all over the internet in all sorts of colours, and love how bright and eye catching it is! Apologies for the picture quality, as it's quite an old one it was taken with my old phone. Will definitely have to try it again and get some better pictures!

The design was done partly freehand and partly with a nail art pen. The blue and white were easy enough to just splodge onto my nails, and the beauty of the black lines it that they are supposed to be a bit messy!


Colours used: Papaya - Barry M, White - Barry M, Cyan Blue - Barry M, Nail Art Pen in Black - Barry M

Thursday, 6 August 2015

Throwback Thursday: Cheats French Manicure!

So it's not often at all that I do a french manicure type design. I'm more of  a nail art or block colour girl, but I'm quite fond of this throwback from a couple of years ago, and want to share the easiest french manicure!

As you can see I haven't gone for the classic french mani colours, and started with a Barry M lilac. Instead of painting a stronger colour along the tips in a curve (and having to faff about getting the widths right!) I simply applied the blue polish in two thick diagonal lines accross the top, and finished with a nail art pen. Easier than pie!


Colours used: Berry - Barry M, Cyan Blue - Barry M, Nail Art Pen in Silver - Barry M

Thursday, 30 July 2015

Throwback Thursday: New York Skyline

Todays Throwback Thursday is one of my favourite nail designs I've ever done, and I don't think the picture does it justice if I do say so myself! Original design was most likely found on Pinterest, I made some amendments and have done this one on friends too. I think the gradient could be improved, I was using sponges that came from shoe boxes at my old job! I still have some and think they work well if you want a rougher effect but make-up sponges would give a smoother gradient.

The black outline was done with a nail art pen and then filled in with a small nail brush, and the white was also done with a nail art pen, getting a few layers on there for a bolder effect. 


Colours used: Blue Moon - Barry M, Cyan Blue - Barry M, Baker Street - Nails Inc, Nail Art Pen in Balck - Barry M, Nail Art Pen in White - Barry M, New York Noir by Kate Spade - Nails Inc